-- Template Author Help --
-- How Do I? --
Changing the Name of a Financial Statement Area
All areas of the financial statement are listed with their default names. These are the names that will appear throughout the product and the financial statements. Each area has a list of available options from which to choose, or a manual selection can be added. Use the Lock ![]() icon beside each name to prevent end users from changing the statement names in the client file.
icon beside each name to prevent end users from changing the statement names in the client file.
Procedure
- In the Document Manager, open the CL - Organization standards document.
-
From the Organization Settings pane, select Names. The Names pane is displayed.
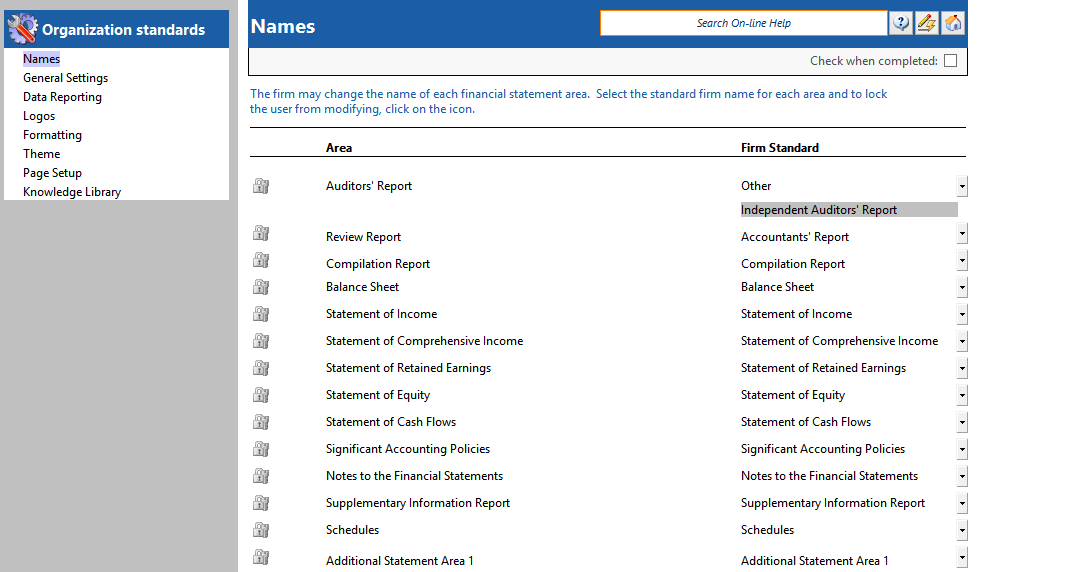
- In the Area column of the Names pane, locate the area whose name you want to change.
- From the drop-down in the Standard column, select an appropriate name from the selection.
- If you select Other from the drop-down, type the name of the area in the field provided.
- Repeat steps 3 through 5 for all areas whose name you want to change.
- If you want to ensure that a statement area name cannot be changed during an engagement, click the Lock
 icon next to a report area name.
 - Click the Check when completed check box.
Results
The financial statement area names are specified for the client file.


