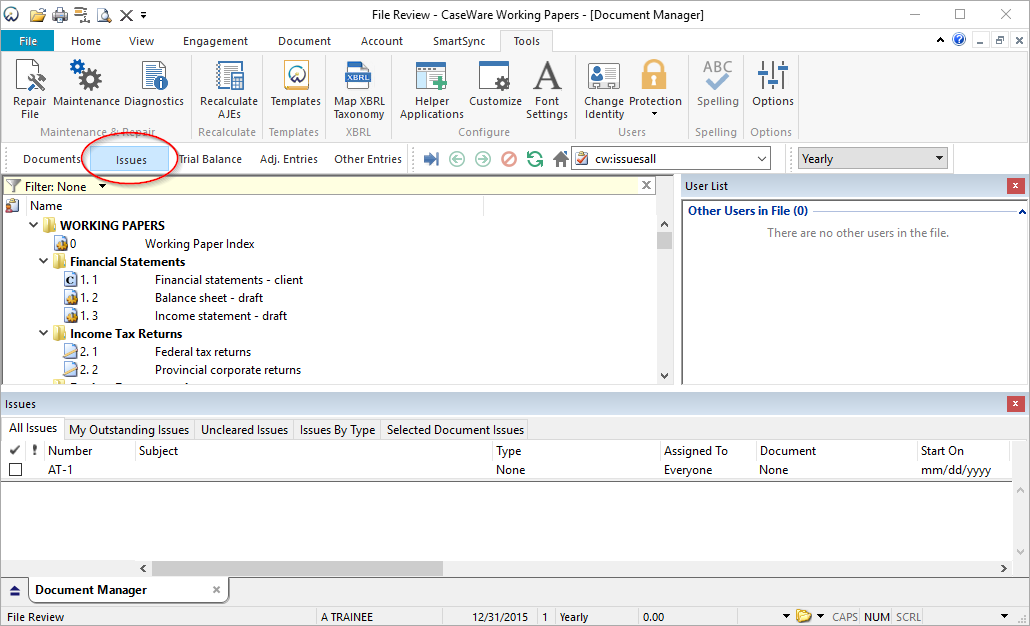
Issues Pane
You can use the issues pane to work on, track, and manage issues in the client file. This interface is organized into views that you can use to filter issues by property.
To access the issues pane, click Issues on the Navigation Toolbar.
Default views
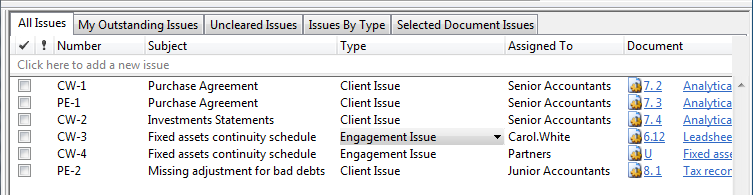
The default views are preset and appear as tabs from this interface:
| View | Description |
| All Issues |
Lists all existing issues. |
| My Outstanding Issues | Sorted to show issues assigned to the current user, a group they belong to, or to everyone, where the issue is not completed or cleared. |
| Uncleared Issues | Sorted to show issues that have been completed but are not yet cleared. |
| Issues by Type | Sorted by type of issue. |
| Selected Document Issues |
Shows those issues associated with the currently selected document. |
Tip: Customize the viewing tabs by right-clicking anywhere in the Issues pane and selecting Settings | Customize Views. See Customizing Views for more information.
The following columns are available in the issues pane:
| Column Type | Description |
| Cleared* |
Select this check box to clear a single issue or multiple issues at the same time. This check box can be used to sort the issues that are pending review from those that have been reviewed. |
| Priority* | Set the priority status to low, normal, or high. |
| Number* |
Enter a unique number to identify the issue. The default number is created from the initials (for role completion) specified in the User Identification dialog followed by an incrementing number. You can modify the issue number as required by typing over the default issue identifier. Note: The issue number field is not mandatory. |
| Subject* | Enter a description of the issue. |
| Type* |
Click the Type column and select an issue type from the drop-down menu. To add, delete, or edit types, right-click anywhere in the Issues pane and select Settings | Customize Types. Click Default to restore the default types. |
| Assigned To |
Click the Assigned To column and select any of the listed users. Assigned To status for an issue can only be changed by an issue's creator, users assigned to that issue, or administrators. Note: Inactive users will not be included in this list unless they were assigned to an issue prior to being set as Inactive. |
| Document* | If the issue was created by right-clicking on a document, the document number and description automatically appear in this column. To change the associated document, select a new document number from the drop-down menu. |
| Start on / Due on* | Select appropriate dates for each of these categories. |
| Retain on Cleanup* | Select the check box to retain this issue in the client file after running the cleanup process. |
| Roll Forward* | Select the check box to roll this issue forward into the new client file after a year-end close. |
| Description* | Click the button to open the Description dialog. Enter details about the issue. Adjust the font and paragraph settings by right-clicking within the text area or selecting Font... or Paragraph.... Microsoft Word documents can be pasted or dragged and dropped into this dialog. |
| Status* |
Select the status from the drop-down list choices of:
|
| Percent Complete | This field allows the user to specify the progress of work being done on the issue. |
| Reminder* | Click on the drop-down arrow and select a date. Any user assigned to the issue will receive a reminder about it on the selected date. |
| Resolution | Click the button to open the Resolution dialog. Enter completion information in this field as the issue is being performed. Adjust the font or paragraph settings by right-clicking within the text area and selecting Font... or Paragraph.... Microsoft Word documents can be pasted or dragged and dropped into this dialog. |
| Created By / Created On | These fields are automatically filled in. Neither of these fields can be modified. |
| Completed By / Completed On | These fields are automatically filled in. Neither of these fields can be modified. |
| Cleared By / Cleared On | These fields are automatically filled in. Neither of these fields can be modified. |
| Modified On | This field is automatically changed and saved each time the issue is modified. |
| Description Modified On | This field is automatically changed and saved each time the description field is modified. |
| Resolution Modified On | This field is automatically changed and saved each time the resolution field is modified. |
Note: Any Column Type marked with an * can only be edited by the user that created the issue or an administrator.
Tips
- You can clear or delete multiple issues at one time. On the Issues pane, select a single issue or use the Ctrl key on your keyboard to select multiple issues. To delete multiple issues, press Ctrl+D or the Delete key.
- To customize the columns, right-click in the Issues pane and select Settings | Show Columns.


