Creating New Issue Views
You can use the default issue views from Working Papers to query issues created in the file. Create new views to find issues with specific properties such as by assignee, date, or document.
Procedure
- Open the issues pane.
-
Right-click on the tab menu and select New View.
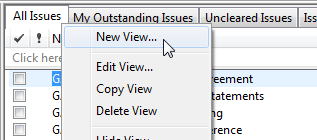
Tip: If you want to use an existing view as a template, use the Copy View command.
-
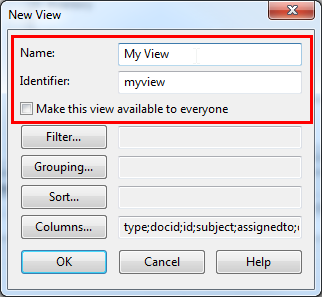
Choose a name for the view, such as "My View".
If you select the checkbox Make this view available to everyone then anyone with access to the client file can see this view.
-
Configure the following settings to target specific issues and specify groupings and sort orders.
Familiarize yourself with the issue properties to optimize this view. >>Quick Reference
-
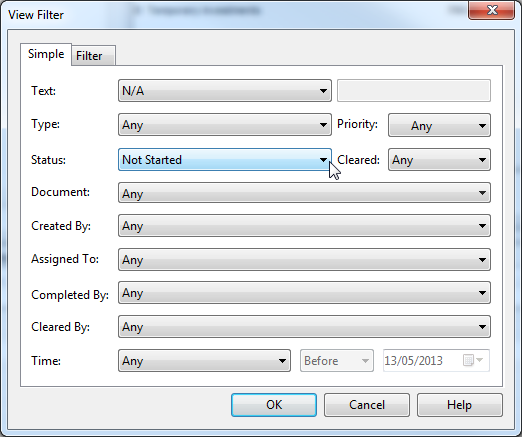
Filter
Show only issues with specific properties in this view.
-
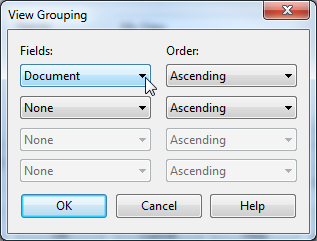
Grouping
Group the issues by property in this view. Specify the order of appearance as well (Ascending or Descending).
-
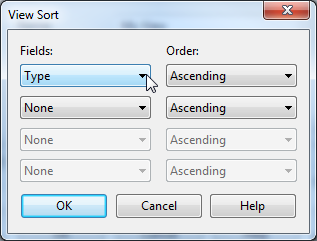
Sort
Sort the grouped issues by an additional property. Specify the order of appearance as well (Ascending or Descending).
-
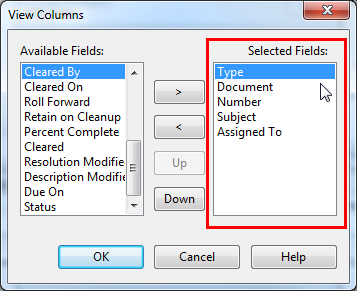
Columns
Show only specific properties of an issue as columns in this view. Move any of the available fields to the selected column and order them using the Up / Down buttons (the top-most field appears as the left-most column in the issues pane).
-
- Click OK.
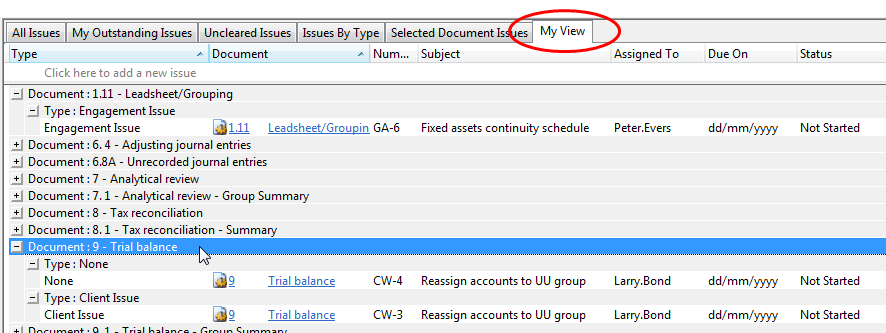
Results
The view is added as a tab on the issues pane. The tab is labeled with the view name and displays only the issues as specified in the view settings.