Network Administrator Installation Guide
Introduction
Network Licensing depends on three primary components:
- License Server
- Administrative Tools
- Working Papers
The License Server can be installed on supported computers (see System Requirements) that is always on.
The Administrative Tools can be installed on any workstation computer and can be used to administer the Network License Server, including adding licenses and managing commuter licenses.
Working Papers can be switched to network licensing mode and will search the local subnet for a license server. If a license server is found, the client can attempt to acquire the appropriate license for Working Papers. If a license server cannot be found, the client can enter the host name of the license server manually into the prompt.
Installing the License Server and Administrative Tools
Procedure
- The CaseWare Network License Server installer can be found on the FTP site in the \License Server\ directory.
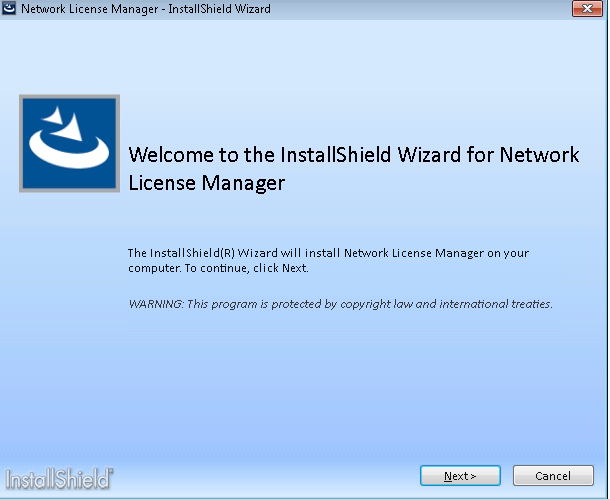
- Execute setup.exe from a user account with account privileges on the server computer to open the Network License Manager install wizard.
- Follow the instructions in the Wizard to complete the installation.
Tip: In the Custom Setup screen, you have the option to install the Network License server with Administrator tools or install them separately.The Network License Server needs to be installed on the Server that will manage licenses and the Administrator tools can be installed on the Server or another workstation on the Network.
Result
The Network License Server will be installed as a Service and can be located in the Control Panel | Administrative Tools | Services as Sentinel RMS License Manager.
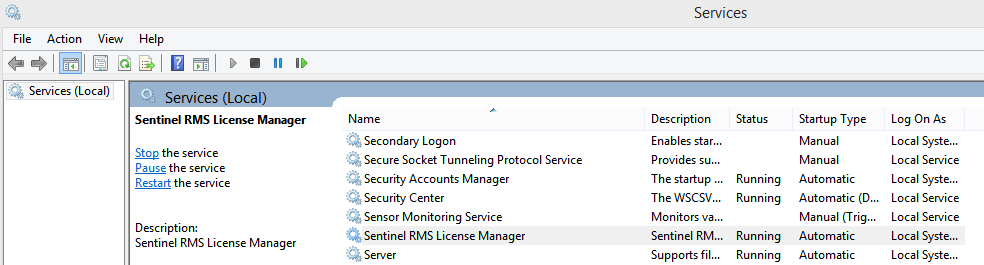
If the license server does not appear in the Services listing, navigate to the license server installation directory (C:\Program Files\Common Files\SafeNet Sentinel\Sentinel RMS License Manager\WinNT) and execute loadls.exe to start the license server service.
The License Manager (Administrator Tools) can be found by clicking the Start button  and navigating to CaseWare International | License Managerdirectory.
Windows Firewall
The license server may need to be added to the exception list in the Windows Firewall or any third party firewall that may be running on the license server. Check to see if the license server has been added to the exception list by navigating to Control Panel | System and Security | Windows Firewall | Allow program or feature through Windows Firewall. If it does not appear, select Allow another app and browse to the license server installation directory and select lservnt.exe.
In addition, you may need to add a port exception for TCP Port 5094.
Adding Port Exception:
- In the left pane, click Advanced settings
 . If you're prompted for an administrator password or confirmation, type the password or provide confirmation.
 - In the Windows Firewall with Advanced Security dialog box, in the left pane, click Inbound Rules, and then, in the right pane, click New Rule.
- Select Port and type 5093 in the Specific local ports field.
- Click Next and select Allow the connection. Click Next and select the profiles for which the rule to apply.
- Click Next and type a Name for the rule. Click Finish to add.
Generating your Server's Locking Code
In order to return a License String for your server computer, your distributor requires your server's Locking Code(New Style). To check the locking code, on the server computer, click Start button and navigate to CaseWare International | Get License Code.
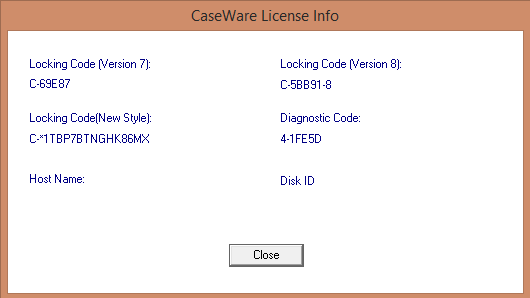
The locking code is a hardware-based fingerprint of the server computer. All issued licenses will be locked on this computer. Send this information to your distributor to obtain your license code.
Adding a License
Prerequisite
- Obtain license code from your distributor before adding the license to your Network License Server.
Procedure
- Click the Start button and navigate to CaseWare International | License Manager.
- On the left pane, expand Subnet Servers and select the computer on which the license server has been installed.
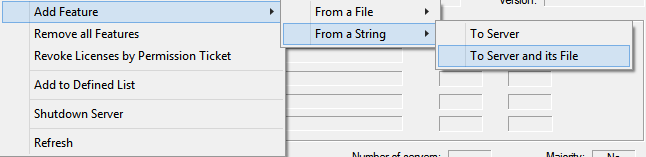
- Right-click the server in the list and select Add Feature | From a String | To a Server and its File.
- Copy and paste the license code sent to you by your distributor into the License code box.

Result
The purchased license is now visible below the server. Users can now get a license code by pointing to your Network License server.
Generating Remote Commuter license
Procedure
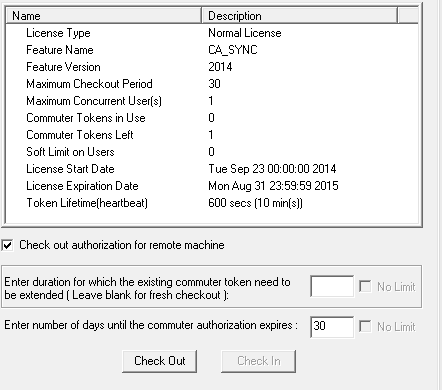
- Click the Start button and navigate to CaseWare International | Commuter.
- Click Search to search the Subnet for your license server, or click Single Server and enter the address of the server.
- Select the Check out authorization for remote machine box, and set the number of days for the commuter authorization (default 30).
4. Copy and paste the Remote Locking Code into the Locking code string box.
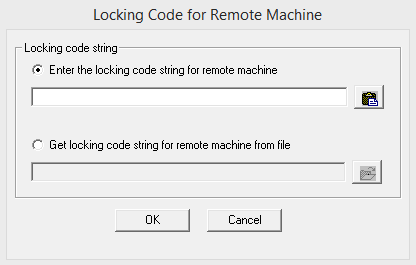
5. Click to Save
Result
The authorization is saved to a file that can be sent to the end user.
Note: Do not change the server name or domain membership as this will invalidate your license and cause license issues when a commuter license is checked out.
Repository Licenses
Repository licenses have been added to make it easier for end users. When a workstation requests a license from a network server with a repository license, it receives a local stand-alone license for the duration of the network license term. As a result, users working offsite will receive semi-permanent commuter checkout licenses automatically when requesting a license.
Note: Repository Licenses cannot be used by end user stations that are terminal server or Citrix.
Revoking Licenses
Commuter Licenses should be checked in before making infrastructure changes, otherwise you will lose the ability to check in the licenses and must wait for them to expire. If your Network License is a Repository License (semi-permanent machine-locked license), you will need to check in the license on each workstation before making infrastructure changes or changes to the license server. This can be done by end users through the Working Papers User Interface, but we also provide a command-line option for executing a commuter check-in.
More information on license revocation is available in the section License Revocation Wizard.
Procedure
- Click the Start button and navigate to CaseWare International | License Manager.
- From the Tools menu, select Generate Revocation Password.
- Type a password and click Generate and then select a directory to save the revocation password.
- Right-click the applicable license server and select Revoke to generate a permission ticket.
- Send permission ticket to support.
From the command-line or a script, execute “cwin32.exe /commutercheckin” or “cwin64.exe /commutercheckin” to execute the check-in process. If you monitor the result code, a result of 0 indicates success, any other result is failure.
Working Papers will also do both of these things (where applicable), when it is uninstalled.
If you wish to suppress this behaviour, you can call the Uninstall command with the NOREVOKE=1 and/or NOCHECKIN=1 properties to leave the existing license in place.
Revoking Licenses will allow the end user to reduce the number of License Tokens.
Response Codes for Commuter Check-In
| COMMUTER_SUCCESS | 0 |
| COMMUTER_ERROR | -1 |
| COMMUTER_CANNOT_CONTACT_SERVER | -4 |
| COMMUTER_CANNOT_FIND_FEATURE_INFO | -5 |
| COMMUTER_FEATURE_NOT_COMMUTER_TYPE | -6 |
| NO_MORE_COMMUTER_LICENSE | -7 |
| COMMUTER_LICENSE_CHECKED_BY_CLIENT | -9 |
| COMMUTER_LICENSE_IS_REMOTELY_CHECKED | -10 |
| COMMUTER_LICENSE_NOT_CHECKED_BY_CLIENT | -11 |
| COMMUTER_LICENSE_EXPIRED | -12 |
| COMMUTER_NOSPECIFY_SERVER | -13 |
| COMMUTER_NOCONTACT_SERVER | -14 |
Response Codes for Commuter Check-In
| LS_SUCCESS | 0 |
| LS_FAILURE | non 0 |


