Creating Custom Linkages
Non-standard or Do-It-Yourself tables in schedules and notes have layouts that are very different layouts from the standard formats, so it is necessary to use Custom Linkages to set up the linkage.
Prerequisites
To create a custom linkage, you must have created the financial statement area content to serve as the source and target for the linkage.
Creating a Custom Linkage to a Note
You can define a custom linkage to a note in the financial statements.
Procedure
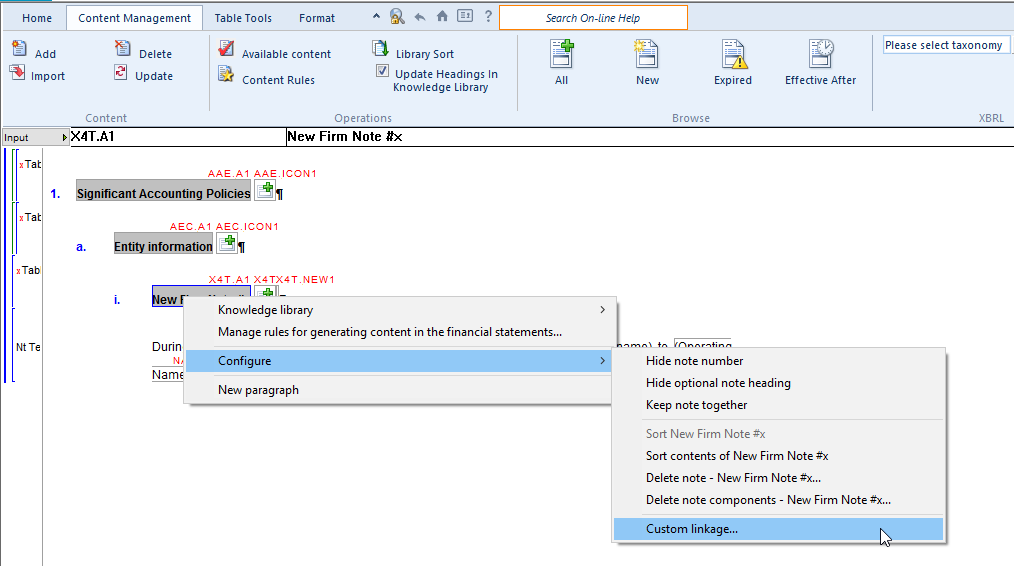
- In the Note Library document, right-click the lowest-level heading for the note that you want to link to.
-
From the shortcut menu, select Configure and Custom Linkage. A linkage pane appears.
- Select the Simple Linkage check box to create a simple linkage. A simple linkage associates tables with matching column layouts by automatically selecting the columns that should be linked to each other. If you have selected this check box, skip the remaining steps in these instructions.
- If you have not selected the Simple Linkage check box, in the Number of Additional Linkage Points field, type the number of linkage points needed.
- Click on one of the Parent or Consolidated linkage points. The available linkage points are Current period, Prior period 1, Prior period 2, and Budget.
- In the note or schedule, click the cell that is to be linked.
- Click OK to complete the linkage.
- Repeat steps 5 through 7 until all necessary linkage points have been specified.
Results
The linkage to the note is now created.
Creating a Custom Linkage to a Do-It-Yourself Schedule
You can define a linkage to any Do-It-Yourself schedule that you have created.
Procedure
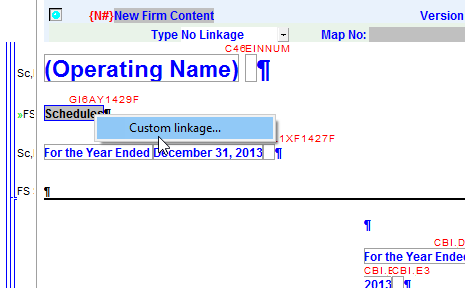
- In the Firm Library document for the schedule, right-click on the Schedules heading.
-
From the shortcut menu, select Custom Linkage. A linkage pane appears.
- Follow steps 3 through 8 in the instructions in Creating a custom linkage to a note.
Results
The linkage to the Do-It-Yourself schedule is now completed.