Configuring tables
In the Cash Flow Worksheet, you have the ability to insert, delete or sort activities in any cash flows area. You can also insert, delete or sort rows within the activities tables.
Prerequisites
The number of activities that you define is equivalent to the number of items that you determine is required for analysis for a particular cash flows area. Each analysis item represents one line on the cash flows statement.
For example, if Operating Activities requires three line items in the financial statements, you need to create three activities in the Operating activities section of the Statement of Cash Flows Worksheet.
- Inserting activities
- Deleting activities
- Inserting rows
- Deleting a row
- Sorting activities
- Sorting rows
Inserting activities
You can add additional activities to any of the following cash flow areas in the Statement of Cash Flows Worksheet:
- Operating activities
- Investing activities
- Financing activities
- Other
- Supplemental data
Each activity item represents one line on the cash flows statement.
For example, if Operating Activities requires three additional line items in the financial statements, you need to create three activities in the Operating activities section of the Cash Flow Worksheet.
Procedure
-
In the Statement of Cash Flows Worksheet, navigate to the cash flow area into which you want to add an activity. See Accessing worksheet sections for details on how to quickly access any section of the worksheet.
- Click the Table Tools tab.
- From the
 (Insert) drop-down, select Activities.
 - In the Insert Items dialog, type or select the number of activities to insert.
- Click OK.
Results
The new activities are added to the specified section of the Statement of Cash Flows Worksheet.
Deleting activities
You can delete any activities that you have created.
Procedure
- In the Statement of Cash Flows Worksheet, navigate to the cash flow area into which you want to delete an activity.
- Click the Table Tools tab.
- From the
 (Delete) drop-down, select Activities.
 - In the Item(s) available for deletion dialog, select the check boxes next to the activities to be deleted.
- Click OK.
Results
The selected activities are deleted.
Inserting rows
You can insert one or more rows into an activity table in the Statement of Cash Flows Worksheet.
Procedure
- In the Statement of Cash Flows Worksheet, click in the activity table in which you want to add rows.
- Click the Table Tools tab.
- From the (Insert) drop-down, select Rows.
- In the Insert Lines dialog, type or select the number of lines to insert.
- Click OK.
Results
The new lines are added to the activity table.
Deleting a row
You can delete a row from an activity table.
Procedure
- In the Statement of Cash Flows Worksheet, click in the row that you want to delete.
- Click the Table Tools tab.
- From the (Delete) drop-down, select Rows.
- In the warning dialog that asks you to confirm whether you want to delete the selected row, click Yes.
Results
The selected line is deleted.
Sorting activities
Within a cash flows section, you can sort the order of the activities. This does not affect the order in the financial statements.
Procedure
- Click in the section that you want to sort.
- From the Home tab, select
 (Sort Activity). Or, alternately, from the Table Tools tab, from the (Sort) drop-down, select Activities.
 -
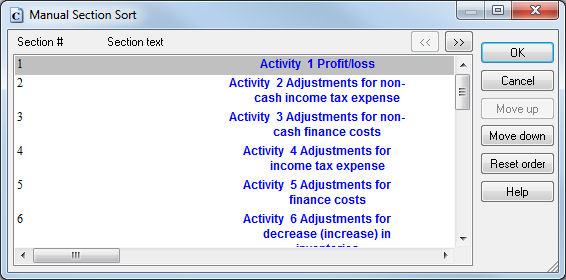
In the Manual Section Sort dialog, use the Move up and Move down buttons to sort the activities.
- Repeat steps 2 and 3 until all of the activities have been sorted.
- Click OK when finished.
Results
The activities within the section have been sorted.
Sorting rows
In the Statement of Cash Flows Worksheet, you can sort the rows in an activity table.
Procedure
- In the Statement of Cash Flows Worksheet, select an activity table to sort.
- In the Table Tools tab, from the (Sort) drop-down, select Rows.
-
From the shortcut menu that appears, select one of the following:
Option Description Manual Sort the rows manually, as described in the following steps. Ascending Sort the rows in ascending order based on the text in the description field. Descending Sort the rows in descending order based on the text in the description field. - If you have selected Manual in step 2, the Manual Section Sort dialog appears, enabling you to sort the rows manually. (If you have clicked Ascending or Descending, do not do any of the remaining steps.) From this dialog, select a row to sort.
- Click Move up to move the row up in the table, or click Move down to move the row down in the table.
- Repeat steps 3 and 4 until all of the rows have been sorted.
- Click OK to close the Manual Section Sort dialog.
Results
The specified activity table is sorted.