Formatting the worksheet
Financials provides options that enable you to control how the Statement of Cash Flows Worksheet is displayed.
Prerequisites
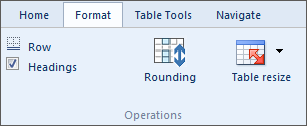
To format the Statement of Cash Flows Worksheet, you must open the worksheet and select the Format tab.
Adding or removing underlines
In the Statement of Cash Flows Worksheet, you can specify underlining for any line in a table.
Procedure
- Open the worksheet and select the Format tab.
- Select the line that is to be underlined.
-
Click
 (Underline). The Underline dialog appears.
 - Click Select All to specify an underline for all columns, or click on the columns for which an underline is to be defined. Note: Unselected columns will have no underlines.
- From the Underline Type drop-down, select the type of underline to use.
- From the Line Color dialog, select the color for the underline.
- From the Thickness dialog, select the thickness of the underline.
- Select the Underline Skips check box if you want the underline to appear even if the line is skipped. This is useful if the skipped line is the line immediately preceding a subtotal or total.
- Click OK.
Results
The specified underlining is applied to the line.
Displaying headings
In the Statement of Cash Flows Worksheet, you can specify whether table headings are to be displayed for each of the activities.
Procedure
- Open the worksheet and select the Format tab.
- Select the Headings check box to display the headings, or unselect it to hide them.
Results
The headings are displayed or hidden as specified.
Apply rounding
You can apply the rounding to the Statement of Cash Flows Worksheet.
Procedure
- Open the worksheet and select the Format tab
- Click Rounding. The Rounding dialog is displayed.
- Check Apply Rounding and choose the value to round to. Click OK.
Results
Rounding is applied to the worksheet.
Resizing a table
You can specify the point size of the font in which a table in the Statement of Cash Flows Worksheet is displayed. Columns automatically adjust to fit page width when smaller sizes are selected.
Procedure
- Open the worksheet and select the Format tab.
- Select the table to be resized.
- From the
 (Resize table) drop-down, select one of the following:
| Option | Description |
|---|---|
| Default | Use the default font size. The font size is dependent on the standard defined by the template author. |
| Small | Use a font size 10% smaller than the default. |
| Smaller | Use a font size 20% smaller than the default. |
Results
The table is displayed in the specified font.