Configuring the schedules
You can specify options that configure the schedules that are included in the financial statements. Options not defined here are included in Configuring common options.

Adding a schedule
In the Financial statements document, you can add supporting schedules to provide additional information about the firm's assets and liabilities. You have the option to insert a schedule directly into the schedules area, or to define where you want to insert it.
Procedure
- Open the Financial statements document.
- On the Insert tab in the Areas group, click Statements | Schedules....
- Select the schedule you want to add, then click OK.
- On the prompt, select No to define where to insert the new schedule. If you select Yes, the schedule will automatically insert into the schedules area.
- In the Manual Section Sort dialog, select the new Schedules located at the very bottom, then click the Move up or Move down buttons to position the schedule. Click OK.
Results
The schedule is added in a defined position.
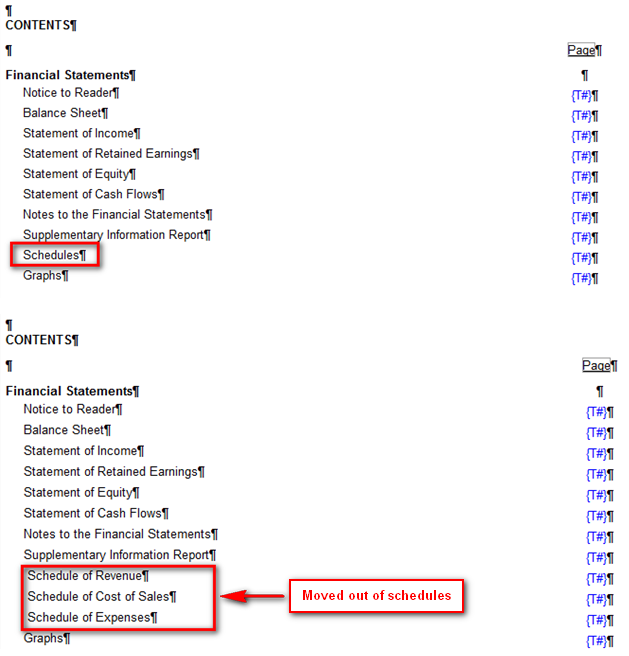
Moving schedules out of and back into schedules area
If your schedule is added to the schedules area, you have the option to move it out of the schedules area and into its own separate area. When schedules are moved out, a new line entry will appear in the Table of Contents that corresponds to the schedule name. You can always move a schedule located outside of the schedules area back into the schedules area, which will display as a single line entry in the Table of Contents.
Procedure
- Open the Financial statements document.
- Click in the schedule that you want to configure and select the Schedules tab.
- Click
 Move out of schedules to move the schedule out of the schedules area. The schedule is moved to the end of the financial statements as a separate area.
 - In the Manual Section Sort dialog, select the schedule from the bottom of the list and click Move up or Move down as required.
- Click in the schedule that you want to move back into the schedules financial statement area.
- Click
 Move into schedules to move the schedule back into the schedules area.
Results
The schedule is moved as specified.
Deleting a schedule
If a schedule included in the financial statements is no longer needed, you can delete it.
Procedure
- Open the Financial statements document, click in the schedule that you want to configure, and select the Schedules tab.
- Click
 (Delete).
Results
The schedule is deleted.