Apply rounding relations
Use rounding relations to change the appearance of numbers and to balance your financial statements. Rounding relations allow you to automatically calculate the difference between two cells and place the difference into a third cell, known as the plug cell.
The rounding formula is as follows: Cell 1 - Cell 2 = Plug Cell
For example, in a Balance Sheet, the rounding relation calculates the difference between the Total Assets cell and the Total Liabilities cell, which displays in the plug cell. For a rounding relation to work, the plug cell (i.e. Accounts Receivable or Accounts Payable) has to be part of the Total Assets or Total Liabilities cell.
The result in the plug cell will vary depending on whether an asset account or a liability account is used as the rounding account, for example:
| If the rounding account is: | Difference cell 1 should be: | Difference cell 2 should be: |
|---|---|---|
| An asset | Total Liabilities | Total Assets |
| A liability | Total Assets | Total Liabilities |
To create a rounding relation:
- Ensure you are working in Design Mode.
- On the ribbon, click Tools | Rounding.
- In the Rounding dialog, select Apply Rounding and Apply Rounding Relations.
- In the Round To drop-down menu, select the level of rounding you want to apply. Selecting Display zeroes will ensure that numbers in the 1000s or higher will display all digits.
- Click Add to create a new rounding relation.
-
In the Relation Properties group, complete the options as follows:
Option Description Difference Cells Enter your first (Cell 1) and second (Cell 2) difference cells in the applicable fields.
Click the Pick cell icon to select a cell from the document rather than enter it manually. Click the Go to cell icon to jump to the selected cell in the document.
Plug Cell(s) Enter a cell where you want to place the resulting difference between Cell 1 and Cell 2.
Click the Pick cell icon to select a cell from the document rather than enter it manually. Click the Go to cell icon to jump to the selected cell in the document.
Click Advanced... to set up multiple plug cells.
Identifier Enter a brief description of the rounding relation. If required, the identifier can include references to the cell numbers in the rounding relation to internally identify it. Display Label Enter a description to display in the Recalculation Error dialog should the rounding relation fail to calculate. This label is used to help identify the area of the document that contains the error.
The display label is also used as a unique identifier during knowledge library updates.
Limit Enter a rounding limit. Any rounding differences that exceed this limit will not be rounded. Apply This Relation Select to activate the rounding relation. - If you want to allow users to enable or disable rounding and rounding relations while viewing the document in Form Mode, select Allow Enabling and Disabling of Rounding in Form Mode and/or Allow Enabling and Disabling of Rounding Relations in Form Mode. Click OK.
The rounding relation is applied to the document. The plug cell will calculate with the difference between Cell 1 and Cell 2. Repeat this process to apply rounding relations to the rest of the document as required.
Notes:
- Rounding and rounding relations only affect cells that are linked to the Working Papers database.
-
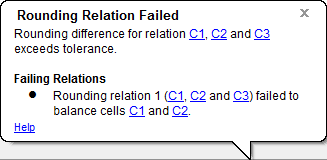
If a rounding relation fails, a notification dialog will display with a list of all the rounding errors. Use this dialog to locate, review and fix the errors.
Set up multiple plug cells
You can set up multiple plug cells in a rounding relation and use skip conditions to control where to display the resulting difference based on its value.
To set up multiple plug cells in a rounding relation:
- Create a new rounding relation, or open the Rounding dialog and select an existing rounding relation.
- In the Relation Properties group, next to the Plug Cell(s) field, click Advanced....
- In the Plug Cell Setup dialog, click Add.
- In the Plug Cell Properties group, in the Cell field, enter a cell where you want to place the resulting difference between Cell 1 and Cell 2. Click the Pick cell icon to select a cell from the document rather than enter it manually. Click the Go to cell icon to jump to the selected cell in the document.
- In the Plug Condition field, enter a skip condition. The skip condition ensures that if the condition is true, the resulting difference will not display in this plug cell and instead checks for the next available plug cell. If the condition is false, the resulting difference between Cell 1 and Cell 2 displays in the plug cell.
- Click Add again to create the next plug cell with a unique skip condition. Repeat as required. When finished, click OK, then OK.
The rounding relation is set up with multiple plug cells. A recalculation is performed to redistribute the resulting difference to the applicable plug cell.
Note: Ensure that you do not create two plug cells with an overlapping skip condition. If two or more plug cells are evaluated as false, the resulting difference automatically displays in the first applicable plug cell, which may not be the correct one.
![]()
Visit us: www.caseware.com | Follow us: 


© 2020 CaseWare International Inc. | Privacy | Terms of Use | Trademarks