Print documents
In CaseView, you can apply various settings to a document to customize the printed output.
Notes:
- To customize the layout of your pages before printing, click File | Print | Page Setup.
- To preview a document before printing, click File | Print | Print Preview. You can merge pages while viewing the Print Preview to reduce the overall page count.
To print a CaseView document:
- Open the CaseView document that you want to print.
- On the ribbon, click File | Print | Print.
-
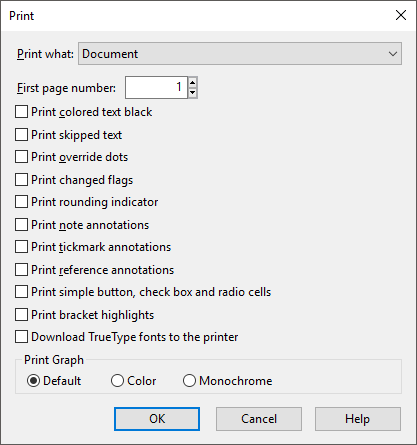
In the Print dialog, click the Print what drop-down menu and select the content you want to print.
Option Description Document Print the entire document.
Document with cell #'s Print the entire document with cell numbers. Calculations Print only calculations in the document. User defined data Print only user defined data in the document. -
Set the starting page number, then select the elements of the document that you want to include in the printed output. If the document contains any charts or graphs, you can override the color scheme if required.
Click OK.
- In the general print options, select your printer, page range, and number of copies. Click Print.
The CaseView document is printed to your specifications. To further customize your print settings, you can set print defaults for CaseView documents in Document | Settings | Print.
Merge pages in a CaseView document
When printing a CaseView document, you can temporarily merge pages where text or tables spill-over to another page to reduce your page count and improve readability.
To merge pages:
- On the ribbon, click File | Print | Print Preview.
- In the Print Preview window, determine the page numbers to merge. To help determine the page numbers, you can modify the settings in the View Layout group.
- In the Fit group, enter the first and last page numbers to merge. Click Merge pages.
The page content merges, reducing the page count by one. If you specified a larger range of pages, you can click Merge pages again to reduce the page count further.
To merge pages using the Merge pages view:
- On the ribbon, click File | Print | Print Preview.
- In the View group, select Merge pages.
- In the Print Preview, use your cursor to select the pages you want to merge.
The page content merges automatically. Merged pages are highlighted in blue. To remove the merge, simply right-click the merge pages and select Remove this merge group, or close the CaseView document.
Notes:
- Text and tables in the merged pages will shrink in size to fit into a single page. Ensure that the content is still legible before printing.
- You cannot merge pages if the text size would be reduced below 6pt, or if the pages contain a page break.
- Page merges are retained when closing the Print Preview dialog, however closing the CaseView document will clear them.