Firm Library - Specifying the heading borders
By default, table heading borders use the settings defined in the Formatting | Underline section of the CL - Organization standards document. You can change the appearance of the table heading border in any table to create an exception to the template defaults.
Prerequisites
Heading borders can be added to a table after content has been added to a financial statement area. See Adding and organizing content for more details.
Procedure
- In the Firm Library document for the financial statement area, click in the section that is to have its heading border changed.
-
From the Format tab, in the Underline group, click Header. The Border dialog appears.
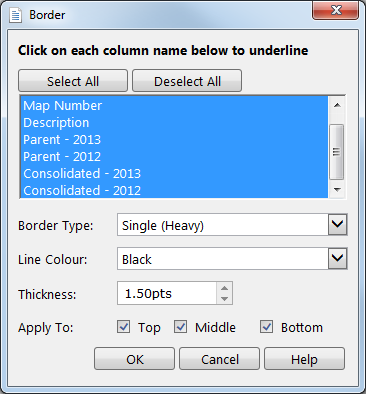
- Click Select All to specify a border for all column headings, or click on the columns for which a heading border is to be defined. Unselected columns will have no heading borders.
- Use the fields in the Underline dialog to specify the underline type, line color, and thickness, and where underlining is to be applied. See Underline dialog for more information on these fields.
- Click OK.
Results
The heading now has the specified borders.
Note: The table heading borders will be reset to the default format defined in the Columns to underline in statements drop-down in the Formatting | Underline section of the CL - Organization standards document.