Using a Non-Default Web Site
You can run SmartSync Server on a non-default web site after installing it to the default web site. Use the following procedure to set up additional SmartSync Server instances that are accessed under a different URL and use different folders to store files.
Prerequisites
Complete the IIS server configuration and the SmartSync Server installation.
Procedure
-
Open Administrative Tools | IIS Manager.
- In the Connections pane, click computer name | Sites.
- On the Actions pane, click Add Web Site.
-
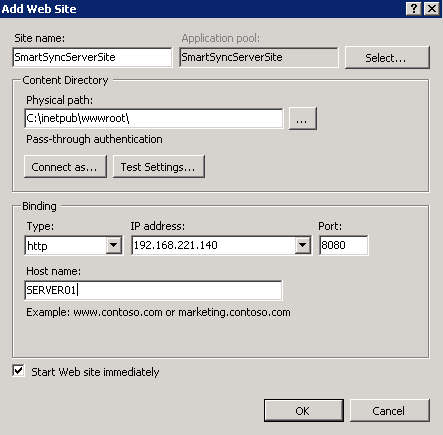
Complete the following fields:
- Site name
- Physical path (Location for the site folder. Click
 to browse for, and create, a folder.)
 - Type, IP address and Port.
- Host name (Type in the name of the server.)
- If applicable: Create a new folder (e.g. SmartSync1) and copy all of the files from inetpub\webroot\SmartSync except web.config into it.
-
On the Connections pane, right click on the new site and click Add Application. We recommend creating a new Application pool for the non-default site. If you are running the non-default site parallel to the default site, the new Application pool should be identical to CaseWareAppPool.
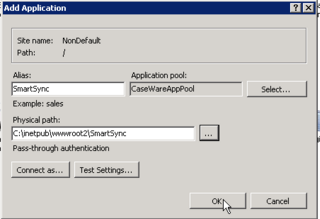
Click OK to add the SmartSync application.
-
Select the new application and double click on the Handler Mapping icon in the center pane.
-
On the Actions pane, click Add Script Map.
-
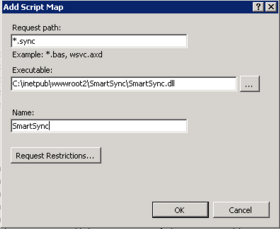
Type the following (items in bold will vary):
- Request path: *.sync
- Executable: C:\inetpub\wwwroot\new web site folder\SmartSync.dll
- Name: user defined
-
Click Request Restrictions and clear Invoke handler only if request is mapped to. Click OK.
- Click OK to close Add Script Map. On the confirmation message, click Yes.
- Select the new application and double click on the Request Filtering icon in the center pane.
- On the Actions pane, click Deny File Name Extension.
-
Enter .dll in the Deny File Name Extension dialog.
-
Select the new application and double click on the Configuration Editor icon in the center pane.
- Add a key named Files with the value set to the location of the SmartSync Files folder (e.g. C:\Sync Files Folder\). This is the SmartSync folder specified during the SSS installation.
Results
The non-default web site has been initialized. The following procedures in this section and under SmartSync Server Post-Installation Configuration also need to be applied to the non-default web site for the set up to be complete.
Notes
- To upgrade a non-default website, you must first upgrade the default website, then copy over the upgraded smartsync.dll file to the non-default website.
- Remove the handler mapping and the original application from the default web site when transferring the SmartSync server to a new site and not setting up an additional server.
- Each separate site can be run by a different account.


