 Avis de non-responsabilité relative à l’utilisation de Google Traduction. Cliquez ici.
Copy Components Wizard
The Copy Components Wizard allows you to copy components from a source file to a destination file.
Welcome
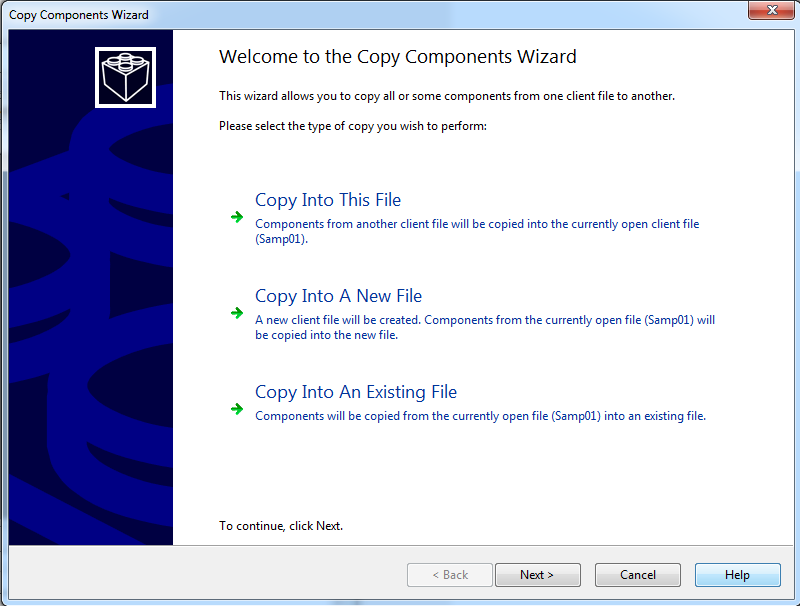
Welcome to the Copy Components Wizard
From the welcome page, select the type of copy you wish to perform.
Select Source
Select Source
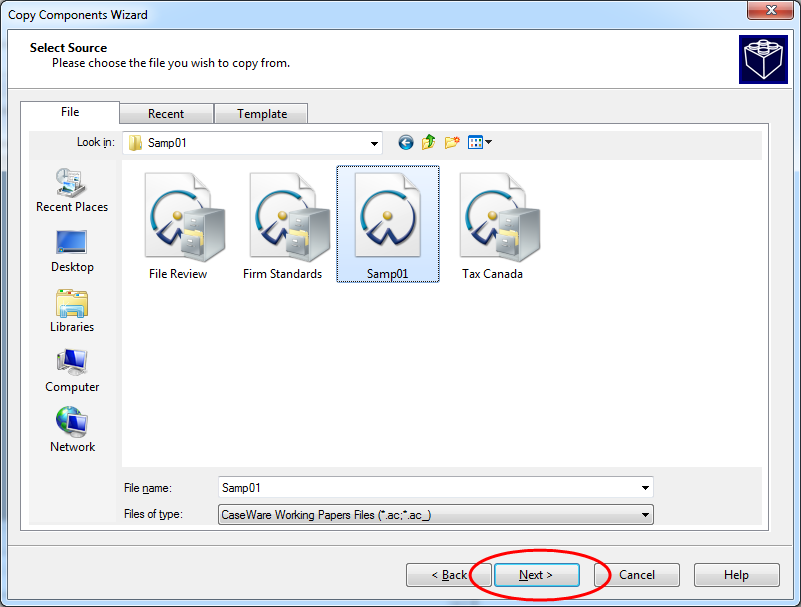
Components from another client file (source file) will be copied into the currently open client file (destination file). Select the source file from the File, Recent, or Template tab. For a description of the type of files available on each tab, click a tab below.
The File tab lets you locate a source file by navigating to it. Select a file to copy from and click Next to continue.
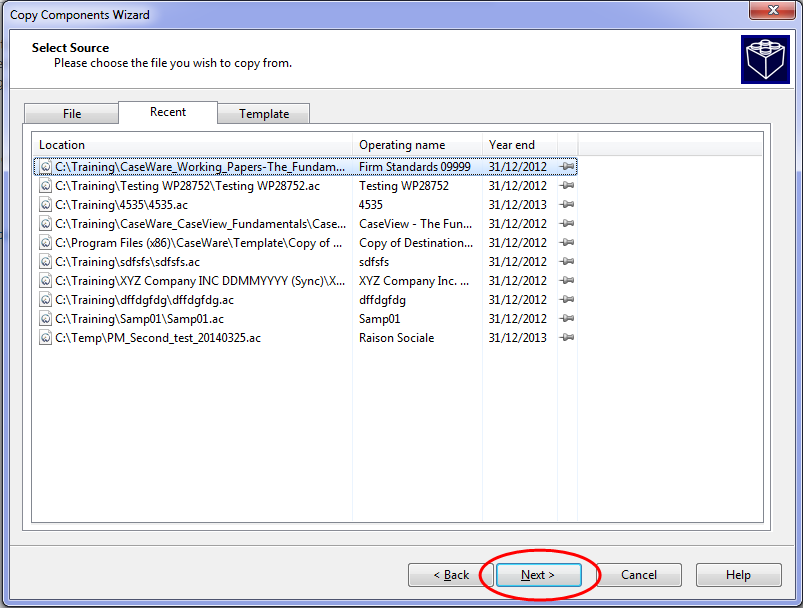
The Recent tab displays all client files that have been recently opened or pinned. Select a file to copy from and click Next to continue.
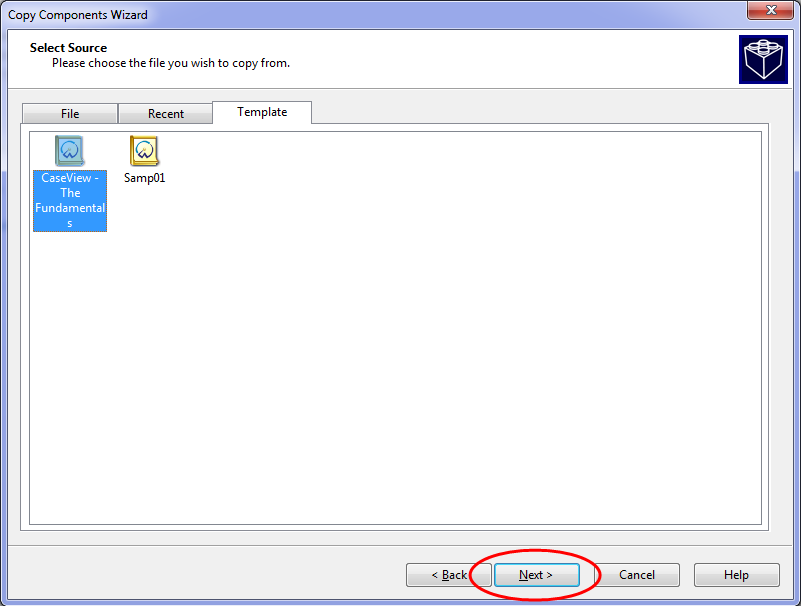
The Template tab displays all templates that have been installed. Select a template to copy from and click Next to continue.
Notes
- If a template is your source file, the 'Template Version' in the source file is converted to 'Source Version' in the destination file. To check the copied version numbers use the File Version Dialog.
- If your destination file is a template and you want to check the 'Template Version' of the newly copied documents, note the template version is reset to 1.0.0.
Select New Destination File
Select New Destination File Page
A new client file (destination file) will be created. Components from the currently open file (source file) will be copied into the new file. Enter a new file name and browse to a location if required. Click Next to continue.

Locate Existing Destination File
Locate Existing Destination File
Components will be copied from the currently open file (source file) into an existing file (destination file). Select the destination file from the File or Recent tab. For a description of the type of files available on each tab, click a tab below.
The File tab lets you locate a destination file by navigating to it. Select a file to copy to and click Next to continue.
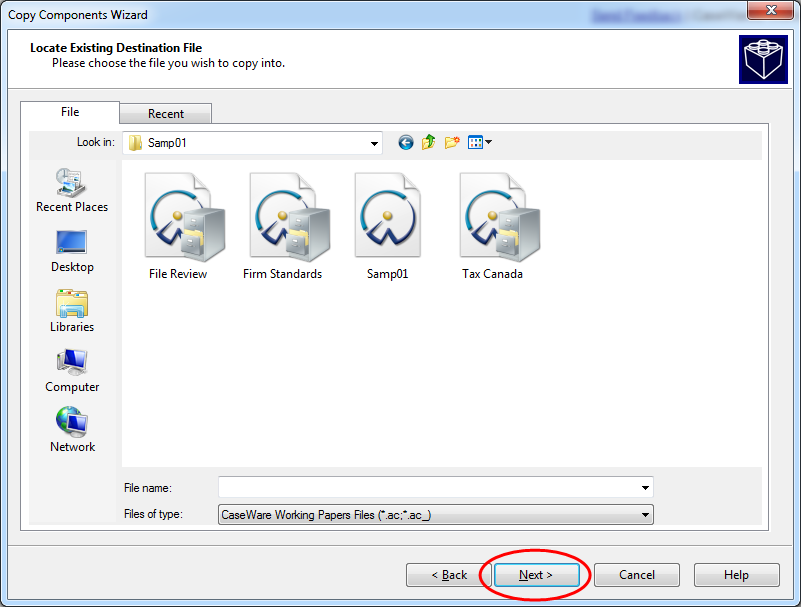
Note: The destination file cannot be the central copy of a signed out file.
The Recent tab displays all client files that have been recently opened or pinned. Select a file to copy to and click Next to continue.
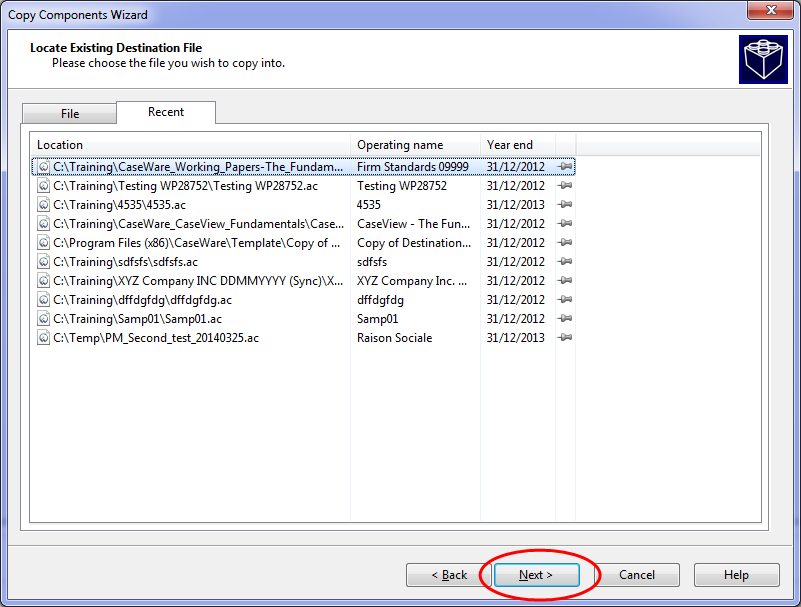
Note: The destination file cannot be the central copy of a signed out file.
Copy Components
Copy Components
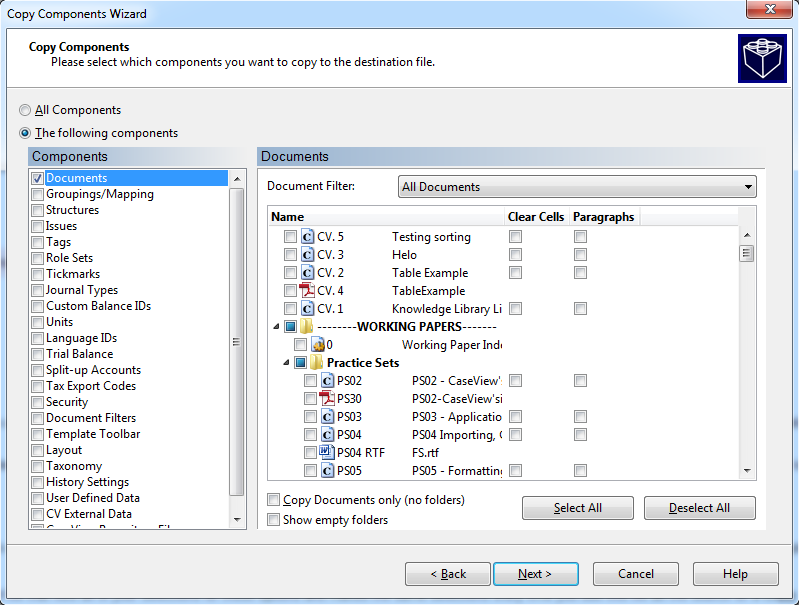
Select the components to copy to the destination file. For a description of available components, select a component in the Components pane below.
Note: Some component options are only shown if your files contain these components.
Select to copy all components of a client file including, but not limited to the Document Manager, the Working Trial Balance/Report setup, the mapping database, programs and checklists, the tickmark library, and CaseView documents.
Note: This option is disabled if the destination file is a synchronized copy or if the file is integrated with CaseWare Cloud.
Select this option to copy selected components of the file. An option is displayed only if it is present in the source file.
Important: If the file is protected and the Security ID is set, there are limitations to copying some components to an existing file. See Security ID overview for additional information.
Select a check box to copy those components.
Select this option to choose the documents that you want to include in the new file.
When choosing documents, note the following:
- Rights are required to copy folders. If the file being copied to is in use by another user, the program generates an error message.
- When copying documents identical to existing documents in the source file, the program checks each document and, if the existing document in the destination file has no annotation, the annotation in the source file is copied into the source file. If the destination document already contains annotation, annotation in the source file will not copy with the document.
- Where two different types of documents have the same number in both the source file and the destination file, the copied document is placed at the top of the Document Manager in the destination file and given the next unique document number that is available in the file. For example if the document number is 2 and number 3 is already in use in the destination file, but not number 4, then the copied document is given the number 4.
Select this option to copy group numbers, map numbers, and their associated tags to the new file. From the Groupings/Mapping pane, select Mapping to copy the source file's mapping database over the destination file's mapping database. Select L/S to copy the leadsheet grouping from the source file to a grouping in the destination file. To specify the grouping in which to copy, select it from the drop-down. Any existing grouping in the destination file will be overwritten.
Click the Set as Default button to preserve the selections that you have made in the Mapping and Grouping options. This will create a template.ini file in the folder for this client file that lists all of your selections for these options and makes the same selections every time you use this file as the source for a Copy Components operation.
This option does not copy any taxonomy assigned to the mapping numbers. The taxonomy database is copied only with the "All Components" option.
You can also specify additional options in the Mapping Copy Options Dialog and Leadsheet or Grouping Dialog.
Select this option to copy structure definitions from the source file into the destination file.
Select this option to copy issues added to documents. For more information on copying issues, see Issues.
When copying issues, you can copy Issues, Issue Views, and Issue Types. The table below describes the behavior when choosing different copy options.
Note: Issue annotations will only be copied if the Issue and the object that annotations are linked to are also copied.
| Component Copied | Behavior Description |
|---|---|
| Views |
|
| Types |
|
| Issues |
|
Select this option to copy tags. Any new tags will be appended to the file. Any existing tags are overwritten.
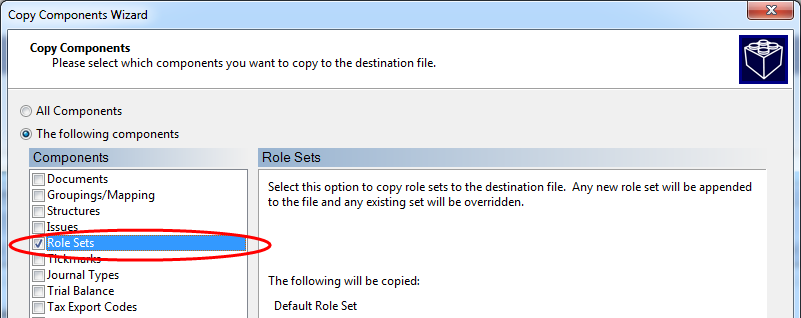
Select this option to copy any existing role sets and their settings.
Select this option to copy the standard and customized tickmarks and any extended descriptions.
Select this option to copy any journal types.
Custom balance IDs are copied. On the Tools ribbon, click Options | Lists | Custom Balances.
Select this option to copy the unit information configured under the Tools ribbon | Options | Lists | Units.
Select this option to copy the language information configured on Tools | Options | Language to the destination file.
Select this option to copy the working trial balance, chart of accounts, leadsheet and grouping assignments, ratio classes, report setup, account linkage, adjusting journal entries, other entries, map numbers assigned to accounts, and engagement values for the Reporting Dates and Period Balances. Annotation and tickmarks copy unless the appropriate clearing options have been selected.
Any accounts that are locked in the source file will also be locked in the destination file by default. In addition, choosing to clear the account balances unlocks all accounts.
Copying the Trial Balance also copies any "After the Fact Payroll" templates or employees existing in the client file. When selecting the Trial Balance option, the Payroll Templates and Payroll Employees check boxes are selected by default and cannot be unselected.
Select this option to copy split-up accounts with their structures to the destination file.
Select this option to copy the tax database to the destination file. Use this option if the tax database has changed (for example if new sub-codes have been added to the default tax database). Any new codes will be appended to the file and any existing codes will be overridden.
Select this option to copy aspects of security including Users and Groups and their respective access rights.
Note: To copy security settings to an existing client file, users must have the following protection rights in the target file: Copy Components and Allow copying of Security Settings. If the user does not have these rights, a notification will appear and the security settings will not be copied.
More information on creating groups and access rights
Select this option to copy custom-built Document Manager Filters to the destination file.
Copies the template toolbar to the destination file. This is an option if your file was created from a template containing a template toolbar.
Select this option to copy the layout of the source file into the destination file. The current layout specified in Tools | Options | Layout tab settings of the source file is copied. This option copies the [filename]st.xml file into the destination file, replacing any existing .xml file.
Select this option to copy the files in the source client taxonomy directory to the program taxonomy directory. For more information, see Taxonomy and Copy Components.
Select this option to copy the history settings configured in the Engagement History Dialog - Settings Tab to the destination file.
Select this option to copy user defined data to the destination file.
Select this option to copy and merge data from CaseView external databases. Any data new than the current data will be appended to the database and any older existing data will be overridden. You can specify additional options for External Cell Data within CaseView in the Copy Template Tab.
Note: This feature does not support deleted data when merging.
CaseView Repository Files
Select this option to import files from the CaseView repository that are referenced in the source file.
Mapping Purges
Select this option to copy mapping purge information under Tools | Options | Mapping | Purge.
Use the drop-down list to view specific documents. The default is All Documents.
Note: If using a Document Filter to show only certain documents, clicking Select All will select all documents shown in the filter. Clicking Deselect All, will deselect all documents in the file - whether they are shown in the filter or not.
Select the check box to the left of the document or folder you want to copy.
Select this check box to copy the contents of all overridden cells cleared out.
Select this check box to clear the contents of input paragraphs, but retain all formatting.
Select to copy only the documents selected and not the folders they are contained in.
This option is enabled if the Copy Documents only option is not selected. If you select the Show empty folders option, the documents in the documents pane are updated to display the empty folders.
Select all documents shown. If you are using a filter, Select All in filter selects only those documents included in the filter.
Deselects all documents. If using a document filter, clicking Deselect All deselects not only the documents shown in the filter, but any documents previously selected.
These controls do not change any selections made in the Clear Cells or Paragraph boxes.
Clearing Components
Clearing Components
Select the components to be cleared in the destination file. Only data that is being copied and can be cleared will be listed. For a description of components, select a component in the pane below.
![]()
Account balance data being copied will be cleared.
Spreadsheet analysis can be removed from copies of spreadsheets that are imported.
Any program and checklist information that has been filled in is cleared using this option.
Foreign exchange rates are cleared in the data being copied using this option.
Any role completions that were filled in on documents can be cleared by selecting this option.
Any program assertions are cleared using this option.
All commentary text is cleared from objects after copying if this option is selected.
Tags applied to grouping/mapping numbers are cleared if this option is selected.
All document reference annotations are omitted from the copy process if this option is selected.
All note annotations are omitted from the copy process if this option is selected.
All tickmark annotations are omitted from the copy process if this option is selected.
All CaseView document references are omitted from the copy process if this option is selected.
All CaseView notes are omitted from the copy process if this option is selected.
All CaseView tickmarks are omitted from the copy process if this option is selected.
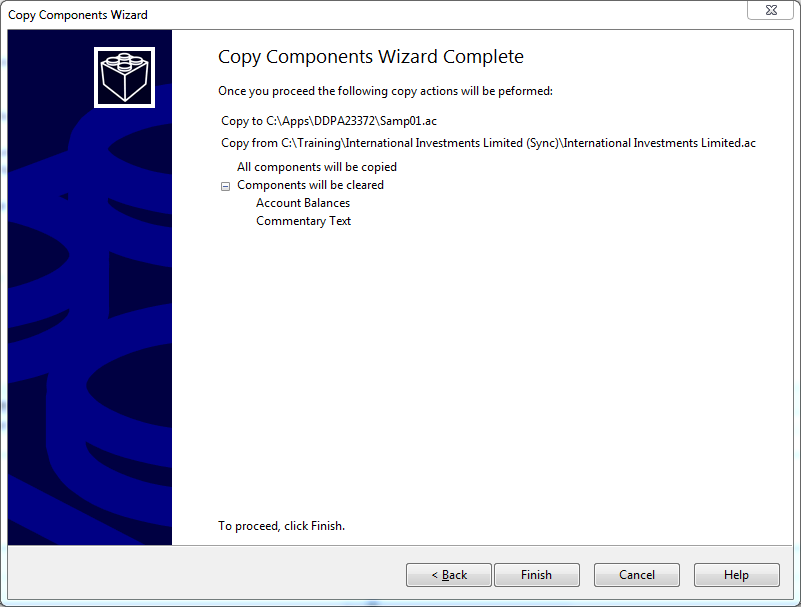
Copy Components Wizard Complete
Copy Components Wizard Complete
This page shows the file paths of your source and destination files and confirms the components to be copied and components to be cleared.
Click Finish to complete the wizard and begin the copy.
Notes
- Copy Components should always be used to create new files instead of copying through Windows Explorer. Creating new files using Windows Explorer can cause corruption in the file, particularly when the source file is integrated with CaseWare Cloud.
- Clearing programs/checklists will remove completion information (such as sign off and references) from all existing programs and checklists in the destination file, not just for the documents and records being copied. To maintain current information, do not clear Program/Checklist information. Copy the data over and manually remove it from the destination file.
- To copy security settings into an existing client file in which protection is enabled, users must have the following protection rights in the destination file: Copy Components and Allow copying of Security Settings. If the user does not have these rights, a notification will appear and security settings will not be copied.that is using protection, users must have the following protection rights in the target file: Copy Components and Allow copying of Security Settings. If the user does not have these rights, a notification will appear and the security settings will not be copied.
- If component names and descriptions have been provided in more than one language, all names and descriptions are copied when the component is copied.
- Copying document version/content version from an external file (source template) into your (destination) template will result in converting the source 'template' version into a 'client' version. You can check the copied version numbers from the File Version dialog.
- If the destination file is a sync file, Working Papers will attempt to apply any outstanding changes when copying components. You will be notified if synchronization conflicts occur.


