Financial Statements - Working with Tables
Financials provides an extensive list of options to manage tables in the financial statements.
The article will discuss about common table operations available for all tables. DIY tables have greater design options in the columns and header.
For more information about editing DIY tables, see Working with DIY Tables.

What do you want to do?
- Inserting or deleting a row
- Inserting a paragraph before or after a table
- Editing a table
- Showing or hiding columns
- Specifying a table or row mapping or grouping
- Sorting table rows
- Resizing a table
- Showing or hiding heading cells
- Editing a heading cell
- Adding or deleting a subtotal
Inserting or Deleting a Row
You can insert and delete a row into any table in the financial statements.
Procedure
- Click in the table that you want to add a new row or select the row you want to delete.
-
From the Table Tools tab, in the Operations group, click
 Insert and then Rows to add a new row or click
  Delete and then Rows to delete a selected row.
Results
A new row is inserted or deleted.
Note:For details on how to replace a table, see Inserting a financial statement area.
Inserting a paragraph before or after a table
You can insert a text paragraph either before or after a table in a financial statement area.
Procedure
- Click in the table that you want to add the paragraph before or after.
- From the Table Tools tab, in the Operations group, click the (Insert) drop-down and select Paragraph before to add a paragraph before the table, or select Paragraph after to add a paragraph after the table.
Results
The paragraph is inserted.
Editing a table
You can edit the properties of a table, including the column size and shading, column formatting, and borders.
Procedure
- Click in the table that you want to edit.
- From the
 (Edit) drop-down, select Table. The dialog can also be access from the right-click menu and selecting Table Properties.
 - Use the fields in the Table Column Properties dialog to edit the table.
Results
The table is updated to use the specified properties.
Showing or hiding columns
Most tables in the financial statements respond to actions in the tabs to determine when a column will display and print. However, you can choose to show or hide columns on the fly.
Procedure
- Click in the table that you want to show or hide columns.
- From the Table Tools tab, in the Operations group, click, (Edit) drop-down, select Show/hide columns. The Show/Hide Columns dialog appears.
- Select the checkboxes next to the columns to be displayed, and clear the checkboxes next to the columns to be hidden. If applicable, select Apply to all tables in this section to apply the setting to all tables in the section.
- Click OK to close the dialog.
Results
The selected columns are shown or hidden.
Specifying a table or row mapping or grouping
Financials uses mapping or grouping to retrieve values from the working trial balance and present in the financial statements. The template author defines the default mechanism to retrieve these balances for the financial statements, but you can specify the mapping or grouping to use in a table or in a row of a table as necessary. This overrides the global mapping or grouping setting. Changes to the default grouping mechanism are denoted with a color change.
For information on setting the global mapping or grouping, see Selecting the default mapping or grouping.
Procedure
- Click in the table or row for which you want to specify the mapping or grouping.
- From the Table Tools tab, in the Operations group, click the (Edit) drop-down and select Table grouping to specify mapping or grouping for a table, or select Row grouping to specify mapping or grouping for a selected row or rows.
- From the shortcut menu that appears, select the mapping or grouping to use.
When the mapping or grouping is selected, the grouping/mapping number selection area becomes shaded to indicate that an alternate grouping is used for this table or row.
Results
The specified mapping or grouping is used in the table.
Sorting Table Rows
In any table, you can specify how the rows are to be sorted.
Procedure
- Click in the table that you want to sort.
-
From the Table Tools tab, in the Operations group, click
 (Sort) drop-down then select Rows.
Option Description Rows Sort rows within a selected table. Header rows Sort the header rows. Available for Do-It-Yourself tables only. Column right Shift the selected column to the right. Available for Do-It-Yourself tables only. Column left Shift the selected column to the left. Available for Do-It-Yourself tables only. Tables Sort tables. Available for statement and schedules Do-It-Yourself tables only. -
If you have selected Rows from the
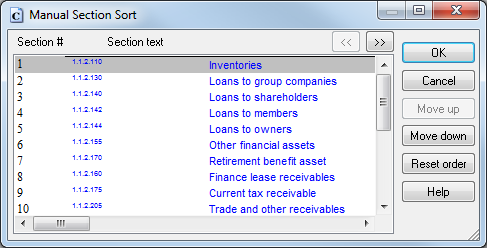
(Sort) drop-down, from the shortcut menu, select one of the following:Option Description Ascending - By This Column Sort the rows in ascending order. The sort criterion is the column in which your cursor is located. Descending - By This Column Sort the rows in descending order. The sort criterion is the column in which your cursor is located. Manually Display the Manual Section Sort dialog to enable you to specify the sort order. In this dialog, use the Move Up and Move Down buttons to reorder the rows. Click OK when you have finished sorting.
Results
The table rows are sorted as specified.
Showing or hiding heading cells
You can specify that heading cells in any table are to be displayed or hidden.
Procedure
- Click in the heading cell to be displayed or hidden.
- From the Table Tools tab, in the Operations group, click
 (Header) drop-down and select Print cell to display the cell, or unselect Print cell to hide the cell.
Results
The heading cell is displayed or hidden.
Editing a heading cell
You can specify that a heading cell in any table is to be marked as an input cell. This enables you to edit the text in the cell.
Procedure
- Click in the heading cell that is to be made editable.
- From the Table Tools tab, in the Operations group, click the (Header) drop-down and select Edit to make the cell editable, or unselect Edit to make it no longer editable.
Results
The heading cell is now editable or not editable as specified.
Adding or deleting a subtotal
You can control the behavior of subtotals in all tables in the financial statements. You can:
- Add or delete subtotals
- Specify that multiple lines are to be subtracted from a subtotal
- Specify that multiple subtotals are to be subtracted from a total.
Note: You can also access this feature from the Home tab.
Procedure
- Click in the table that you want to use a subtotal.
-
From the Table Tools tab, in the Operations group, click the
 (Subtotal) drop-down and select one of the following options:
Option Description Add Add a subtotal in the specified table.
In the dialog that appears, select the lines to include in the subtotal and click OK.
Select the Create collapsible section option to insert a title row above the selected rows with a +/- sign. The - sign collapses the section and hides the selected rows. Only the subtotal displays with the title row description. The + sign expands the section and displays all of the lines of the section.
Uncheck Apply title and subtotal styles if you do not want to use the default title and subtotal styles.
Delete Delete a subtotal from the specified table.
In the dialog that appears, select the subtotals to delete and click OK.
Note: Deleting all rows that make up a subtotal also deletes the subtotal, and where applicable, the collapsible section.
Subtract Perform a subtract operation. . By default, all subtotals add the values in a column. There are instances where you need to subtract a subtotal from another subtotal, for example to calculate gross profit.
From the shortcut menu that appears, select one of the following:
Option Description Set By Rows Select multiple rows in a table to be subtracted from the subtotal. A  (subtract) icon appears next to each selected row.
Set Property By Subtotal From the dialog box that appears, select multiple subtotals to subtract from a total. All of the lines in the subtotal are subtracted. A (subtract) icon appears next to each row in a subtotal.Remove Property By Subtotal Undo some or all of the Set Property By Subtotal operation. From the dialog box that appears, select multiple subtotals that are no longer to be subtracted from the total.
Results
The subtotal is updated as specified in the selected option.


