Managing Notes
Financials includes options that enable you to change the display of notes in financial statements.
Prerequisites
What do you want to do?
- Sorting notes
- Inserting a paragraph after the note heading
- Defining Do-It-Yourself note linkages
- Deleting notes
- Skipping notes
Sorting notes
Financials provides the ability to sort the order of notes in the financial statements and sorting components within a note.
Procedure
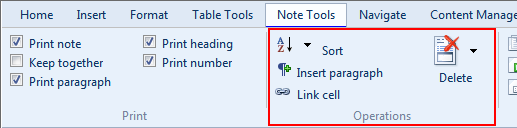
- Open the Financial statements document and select the Note Tools tab.
- In the notes section of the financial statements, click on any note heading.
-
From the
 (Sort) popup menu, select one of the following:
Option Description Sort [heading] Sort all note sections at the level of the note heading. Sort Contents of [heading] Sort all note sections at the level below the note heading. You can use this option to sort components within a note. You must be selected on the specific note title. - In the Manual Section Sort dialog, select a note or note component to sort. Click Move up to move the item up, or click Move down to move the item down.
- Repeat step 4 until all notes or components have been sorted.
- Click OK to close the Manual Section Sort dialog.
Results
The notes are sorted.
Inserting a paragraph after the note heading
You can insert a text paragraph after a note heading.
Procedure
- Open the Financial statements document and select the Note Tools tab.
- In the Financial statements document, click in the note or heading that you want to add the paragraph to.
- Click
 (Insert paragraph).
Results
The text paragraph is added after the note heading.
Defining Do-It-Yourself note linkages
To eliminate rounding issues between statement line items and note totals, Financials provides the ability to link note subtotals/totals to line items in statements, schedules, and other notes. If you have created a Do-It-Yourself note in your financial statements, you can link a row in the note to a line item in a statement, schedule, or other note. When the balance in the note row is updated, the balance in the linked area is automatically updated, thus eliminating any differences.
The template author typically defines these linkages in the knowledge libraries for existing notes, so this setup is only necessary when you insert a Generic Do-It-Yourself note.
Procedure
- Open the Financial statements document and select the Note Tools tab.
- In the Financial statements document, click in the Do-It-Yourself table that you want to link from.
-
Click
 (Link cell). The Custom Linkage window appears.
 - Select the Simple Linkage check box to create a simple linkage. A simple linkage associates tables with matching column layouts by automatically selecting the columns that should be linked to each other. If you have selected this check box, skip the remaining steps in these instructions.
-
If you have not selected the Simple Linkage check box, in the Number of Additional Linkage Points field, type the number of linkage points if the Do-It-Yourself table does not match the default table layout.
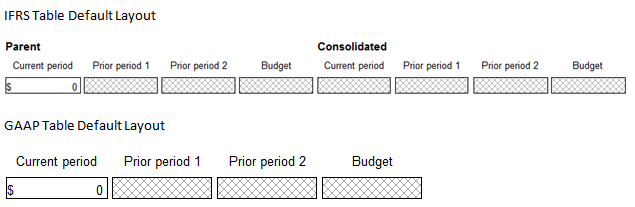

- In the Custom Linkage window, click on the cell for the current period and then click in the note table for the corresponding cell. If using Additional Linkage Points, click in the first cell and then, in the note table, click the corresponding cell.
- Repeat the preceding step until all of the columns that you want to designate as linkable are defined.
- Click OK to close the Custom Linkage window.
Results
The Do-It-Yourself note can now be linked to a statement, schedule or other note. Refer to Working with linkages for more information on how to attach the link.
Deleting notes
If note content is no longer required, you can delete notes from the financial statements.
Procedure
- Open the Financial statements document and select the Note Tools tab.
-
From the
 (Delete) drop-down, select one of the following:
Option Description Current Note Delete the note where the cursor is located. Notes The Deleting content dialog opens to display a list of all notes in the file. Select a check box next to a note to delete it, and click OK to delete the notes and close the dialog. Policies The Deleting content dialog opens to display a list of all policies in the file. Select a check box next to a policy to delete it, and click OK to delete the policies and close the dialog. Components Display a list of the note components for the selected note. You can select the components that you want to delete.
Results
The selected note is deleted from the financial statements.
Skipping notes
There may be a need to skip a note rather than deleting the note from the financial statements.
Procedure
- Right- click the applicable note heading and select Skip Note.

Click to Play

Results
The note skipped is displayed in blue and the remaining notes are automatically renumbered.


