Specifying and Creating an Engagement Profile
As the Firm Author, you can specify whether engagement profiles are to be enabled for client files, and what settings they are to contain.
To specify and create an engagement profile:
- In the AO - General options document, specify the settings, select Engagement Profiles.
-
From the Engagement profile setup drop-down, select one of the following options:
- In the Engagement Profiles pane, scroll down to the first empty engagement profile definition.
- In the Profile field, in the first text field, type the name of the engagement profile.
- In the Description field, type a description of the engagement profile.
-
Click
 to display a list of document tags that you can associate with your profile. If a tag is included in the Assigned pane of the Tags dialog, documents marked in the Document Manager with this tag will be included in the client file when this engagement profile is selected.
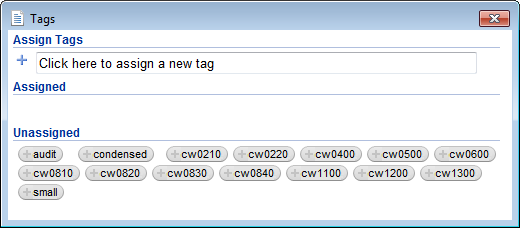
If no tags are included in the Assigned pane, no documents will be deleted from the client file if it is created using this engagement profile.
-
To assign a tag to the engagement profile, in the Unassigned pane, click the + icon at the left of the tag. This moves the tag from the Unassigned pane to the Assigned pane.

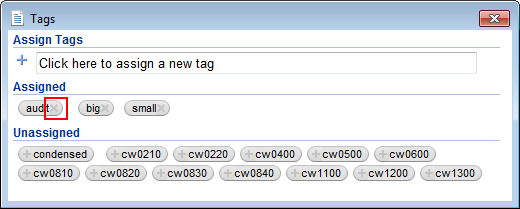
- To create a new tag for the engagement profile, in the Assign Tags pane, type the new tag name in the text field, and click
 . The new tag is added to the Assigned pane.
 - Repeat steps 6 through 7 if you want to assign more tags to this engagement profile. A document is included in any client file created from this profile if it is tagged in the Document Manager with any of the tags you have assigned.
-
To unassign a tag that you have previously assigned, in the Assigned pane, click the X icon at the right of the tag. This moves the tag back to the Unassigned pane.
- Close the Tags dialog when tagging is complete.
- Select the Available check box if this engagement profile is to be made available to client files that are created from this template. To view the Engagement Profile dialog that displays after the client file is created, click Preview.
- Select the Pre-selected radio button if this engagement profile is to be the default profile for client files created from this template.
- If you want to select documents to be opened when a client file created from this engagement profile is opened, in the Start Document column, click
 . In the Document Manager window that appears, expand folders as necessary and select the documents or folders to be opened. If you select a folder, all of the documents and sub-folders in that folder are selected. Click OK when you have selected all of the documents to be opened.
 - If you have provided a more detailed explanation of an engagement profile in an external web site, in the Extended Explanation field, type the URL for this web site.
- Click
 to save the profile. All document tags are saved. If engagement profiles have been configured to use global settings, the settings in the AO - General Options document are also saved in the profile.
 -
To view the engagement profile options that will be available to the engagement team when a new file is created, click Preview. A sample Engagement Profile dialog appears. The text that you specified in steps 3 and 4 is displayed, along with all other previously defined engagement profiles, including the default profiles provided with the template. If you specified a web site in step 14, a link to this site is displayed. Close this dialog when you have finished viewing it.
- Click
 to load a previously defined profile. All document tags and global settings saved in this profile are loaded into your template.
 - Your master template may include several predefined engagement profiles which have the Owner property set to Distributor. You can edit these profiles to create a Firm profile, but there are also spaces to create your own. To reset a profile back to its original settings, click Default.
| Option | Description |
|---|---|
| Documents and global settings | Engagement profiles can be used to remove documents from the Document Manager and automatically launch documents when a new client file is created based oin the master template. In addition, the new client file uses the global settings saved with the profile to configure the firm options, including risk options, control options, reportable item options, and other settings defined in the AO - General Options document. |
| Documents only |
Engagement profiles can be used to remove documents from the Document Manager and automatically launch documents when a new client file is created based on the master template. This is the default option. Note: Any global settings associated with the profile are not used in the new client file. Instead, the global settings defined in the AO - General Options document of the master template, at the time the client file is created, are copied. |
| No engagement profiles | Disable the use of engagement profiles in the template and client files generated from this template. |
This online help system applies to all Caseware Audit, Review and Compilation products. Not all features are available in all products.
![]()
Visit us: www.caseware.com | Follow us: 


© 2022 Caseware International Inc. | Privacy | Terms of Use | Trademarks