Managing Global Settings
Financial statement presentation defaults are already defined, however, GASB Financials provides you the flexibility to re-define some of the default statement settings to meet your presentation preferences. Following is a list of some of the defaults that can be changed.
Fundamental Topics
Rounding the Financial Statements
There are two types of rounding in the financial statements, rounding to the nearest dollar and rounding to help balance the financial statements when minor discrepancies occur. These may be related to decimals in the trial balance rounding to the nearest whole dollar.
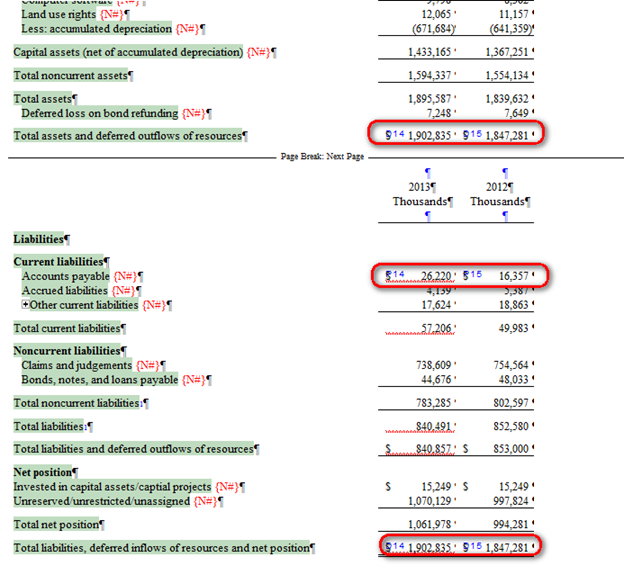
By default, the statements are set to round to 1,000s and this information is prominently displayed in table column headings. You can change the rounding limits and the terminology used if the default does not match your needs.
The rounding to ensure balances agree is already defined in the financial statements, but you may need to add your own relations if you customize the content or add new content.
Rounding to the Nearest Dollar
-
In the Global Setup ribbon, locate the Rounding drop-down. This drop-down can be found in the Balances section of the ribbon.
-
From the Rounding drop-down, select the rounding to use.
Option Description 1 Round numeric values to the nearest whole dollar. 1,000's Round numeric values to the nearest thousand. 1,000,000's Round numeric values to the nearest million. Note: Clicking the
 Titles and terms button in the ribbon launches the same dialog.
 - The Rounding Terminology & Display dialog automatically appears. You can define the rounding terminology and choose where it should display. Your display locations include:
- Statement header
- Column headings
- Description Column
- Click OK to close the Rounding Terminology & Display dialog box.
- If the Settings for Reports dialog box appears, specify the settings to use in reports. For more information on this dialog box, see the Settings for Reports help topic in the Working Papers help. When you have specified the settings, click OK to close this dialog box.
Rounding to Balance
Procedure
-
Click the Apply relations link. A rounding relation pane appears.

- To add a new rounding relation, click
 (Add a rounding relation). To modify an existing rounding relation, click
  (Modify a rounding relation) or
  (Delete a rounding relation) to delete an existing rounding relation.
 - If you are adding a new rounding relation, in the Label field, type a unique label for the new rounding relation. If a rounding exceeds the tolerance, the label will display indicating where there is a discrepancy.
- If you are modifying an existing rounding relation, from the Label drop-down, select the label of the rounding relation that you want to modify.
-
In the Compare these Cells section, you are selecting the cells in the financial statements that should be the same, for example, total assets to total liabilities and net position. Put your cursor in Cell A and the click into the financial statements to select the appropriate cell, total assets. Put your cursor in Cell B to pick the comparative cell, total liabilities and net position.
-
The Apply rounding to is where you plug the difference, if one exists, between Cell A and B. Put your cursor in this cell and then click into the financial statements and select the cell where the difference should plug, accounts payable for example.
Note: An alternate plug cell may be needed if the original plug cell has no balance. If your balance sheet is out by a small amount you would not plug the balance to accounts payable if accounts payable shows a zero balance before the plug. Use the Add Cell button to set up alternate plug cells.
- In the Rounding tolerance field, type the rounding tolerance, which is the maximum allowed difference between Cell A and Cell B. If the difference is greater than the rounding tolerance, an error message is displayed.
- Click Save.
Results
The rounding relation you have specified is added.
Comments and suggestions about this article and our software are greatly appreciated. As a user of our products, you are in a unique position to provide ideas that have an impact on future releases of this and other products.
Before contacting Technical Support, please consult the online Help and any other documentation included with this package as your first source to solve the problem.
If you require additional assistance, you can contact CaseWare® Technical Support by contacting your nearest CaseWare distributor.
When you contact CaseWare® Technical Support, you should be at your computer and have your documentation at hand. Be prepared to provide the following information:
- Your Client Number.
- The product version number, found by clicking the Help menu and selecting About.
- The type of computer hardware you are using.
- The software version number of MS-Windows.
- The exact wording of any messages that appear on your screen.
- A description of what happened and what you were doing when the problem occurred.
- A description of how you tried to solve the problem.
CaseWare Support
NORTH AMERICA
Email: support@caseware.com
Phone: 416-867-9504
GLOBAL


