P2P - Setting up a Peer to Peer Synchronization in the Field
Step 1: Before Leaving the Office
Step 1: Before Leaving the Office
View Related Video: Preparing for Peer to Peer Synchronization
If you are working offsite and require an offline version of Peer to Peer Synchronization help, download this PDF version before going offsite.
 Peer to Peer Synchronization Quick Start Guide
Before heading out into the field, create a synchronized copy of the Top Level Engagement File on the Parent computer. This will become the Child Sync Copy which will be shared with Peers.

Click to Play

For more information on creating a sync copy, click here
Step 2: User Accounts and Share Folder
Step 2: Creating Local User Accounts and Shared Folder
View Related Video: Preparing for Peer to Peer Synchronization
Share the folder with the synchronized copy to users by setting up local user accounts on the Parent Laptop.
Set up local user accounts
To set up local user accounts on the Parent laptop, follow these procedures:
-
Open Control Panel from the Start menu.
-
Access the User Accounts dialog:
- Windows XP: Click User Accounts.
-
Windows 7: Click User Accounts, and then click Manage User Accounts.
-
Click the Advanced tab and under Advanced User Management click the Advanced button.
-
In the Local Users and Groups window, right-click the Users folder and select the option New User.
-
In the New User dialog enter, at minimum, the User name and password and click Create.
-
Check the Users folder to ensure the new local user account exists.
-
Repeat steps 4-6 to create each required local account.
-
Close the dialog and the Local Users and Groups window.
Grant local users full access to the sync folder.
To grant the local user accounts full access to the sync folder, follow these procedures:
-
Right-click on the folder and select Properties.
-
From the Properties dialog, click the Sharing tab.
-
Click the
 button to access the File Sharing dialog.
 -
Enter the User name of a local user account that will be connecting to your computer in the field and click Add.
-
Repeat step 5 for all required local user accounts.
-
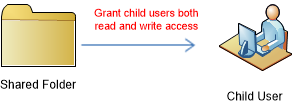
Grant all local user accounts Read/Write permissions and click Share.
-
Click Apply and close the Properties dialog.
Results
All assigned users will be able to access the shared folder containing the synchronized peer parent file. The parent is now ready to go out into the field to connect peers to the parent file.
Step 3: Peers to Parent
Step 3: Connecting Peers to the Parent
View Related Video: Connecting Peers to the Parent
Connect the Peers (Child Users) to the Peer Parent by using a router or switch. If there are not enough cables then alternate connections between peers. Ensure that the parent is connected for these following steps:
-
In Working Papers, on the File tab, select Open and select Computer.

-
Select Network
 and browse to the Parent Computer Name.
 -
Browse to and click on the Parent Computer Name.
-
Enter the assigned user name and password when prompted.
The user name is User name: <Parent_ComputerName>\<User Account Name>
Tip: You may want to select the "Remember my password" checkbox to avoid having to repeatedly enter login information on subsequent connections to the parent.
- Locate the Parent's synchronized copy.
- Click on the file and select the
 check box to create a Child synchronized copy on your local drive.
Tip: You can check or set your Smart Sync default path in the General Options Dialog.
-
Click Open. This launches your child synchronized copy.
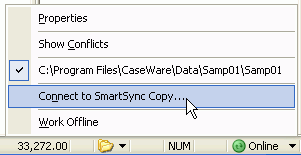
- From the Smart Sync menu, select to Connect to SmartSync Copy.
-
Browse to shared folder and select the Parent's synchronized copy of the engagement file.
-
Click Connect.
Results
After a peer connection is established, Working Papers SmartSync can be used regularly. As a parent, you can verify the users synchronized to your sync copy by accessing Properties on the Sync toolbar. Once your peers have located your sync copy, it will be displayed in their synchronization drop-down menu below the parent file location. As long as you continue to share your sync copy with your peers they will be able to access your file. Only after you disable access permissions on this folder will your peers not be able to access your sync copy.
Note that for a peer to work Online they must be connected to the router or switch while the parent is connected. Choose to work Offline if there are not enough cables to connect all users to the router or switch; you can re-connect at a later time to synchronize your copy.
Notes
- When using a peer connection, CaseView exclusive locks do not work.
- Windows XP has a limit of up to 10 concurrent inbound connections. Windows 7’s limit is 20. If you have more peers than the maximum number of connections allowed then:
- Use Windows Server to increase the number of connections.
- Avoid connecting to the parent laptop with any application except Working Papers
Step 4: Peer to Peer
Step 4: Working Peer to Peer when Parent is Not Connected
View Related Video:Working without a Peer Parent Connection
-
As a peer, repeat the steps in Step 2: Creating Local User Accounts and Shared Folder to create a local user account for the other peers and to share the folder with the synchronized copy.
-
Have the other peer(s) navigate to and open their own local child synchronized copy created in Step 3: Connecting Peers to the Parent.
-
From the SmartSync menu, have the peer(s) select Connect to SmartSync Copy.
-
Have the peer(s) browse to the network location and shared folder of the peer.
The path is \Peer_ComputerName\Path_to_Shared_folder
-
Have the peer(s) select your synchronized copy of the engagement file and click Connect. The connecting peer must enter the local account login information provided.
Results
After the peer connection is established, the sync indicator is colored yellow . This indicates that the connection is to another sync copy rather than the immediate parent. You can verify who is synchronized to your sync copy by accessing Properties on the Sync toolbar.
Notes
- If you are connected to a peer and the top-level parent file becomes available, your connection is not automatically switched to the parent file unless you attempt to perform an operation that requires this connection (for example, lock down or clean-up). In all other cases, you must explicitly switch to the top-level parent file by selecting it from the SmartSync menu.


