Importing from Sage 50 Accounting CDN Edition (Simply) and Simply Accounting for Windows versions 2008-2018
Working Papers allows you to import client data from Sage 50 Accounting Canadian Edition and Simply Accounting for Windows. If you are importing from any version from 2008 to 2018, follow the instructions below. For instructions on importing from older versions, click here.
Note: To import from Sage 2018, download the latest version of Sage 50 Connection Manager from MyCaseWare, or install Sage 2018 on the computer where the import is taking place.
Requirements
- If you do not have Sage 50 Accounting CDN Edition (Simply) installed, you must first download and install the Sage 50 Connection Manager. If Sage 50 is installed on your computer, uninstall the Sage 50 Connection Manager prior to the attempting an import.
The required Simply Accounting files include:
| File/folder name | Containing... |
|---|---|
| filename.SAI | Simply Accounting client database |
| filename.SAJ | Folder containing the data file |
Note: The entire SAJ folder and the SAI file found in the parent folder of the SAJ folder are required.
Prerequisites
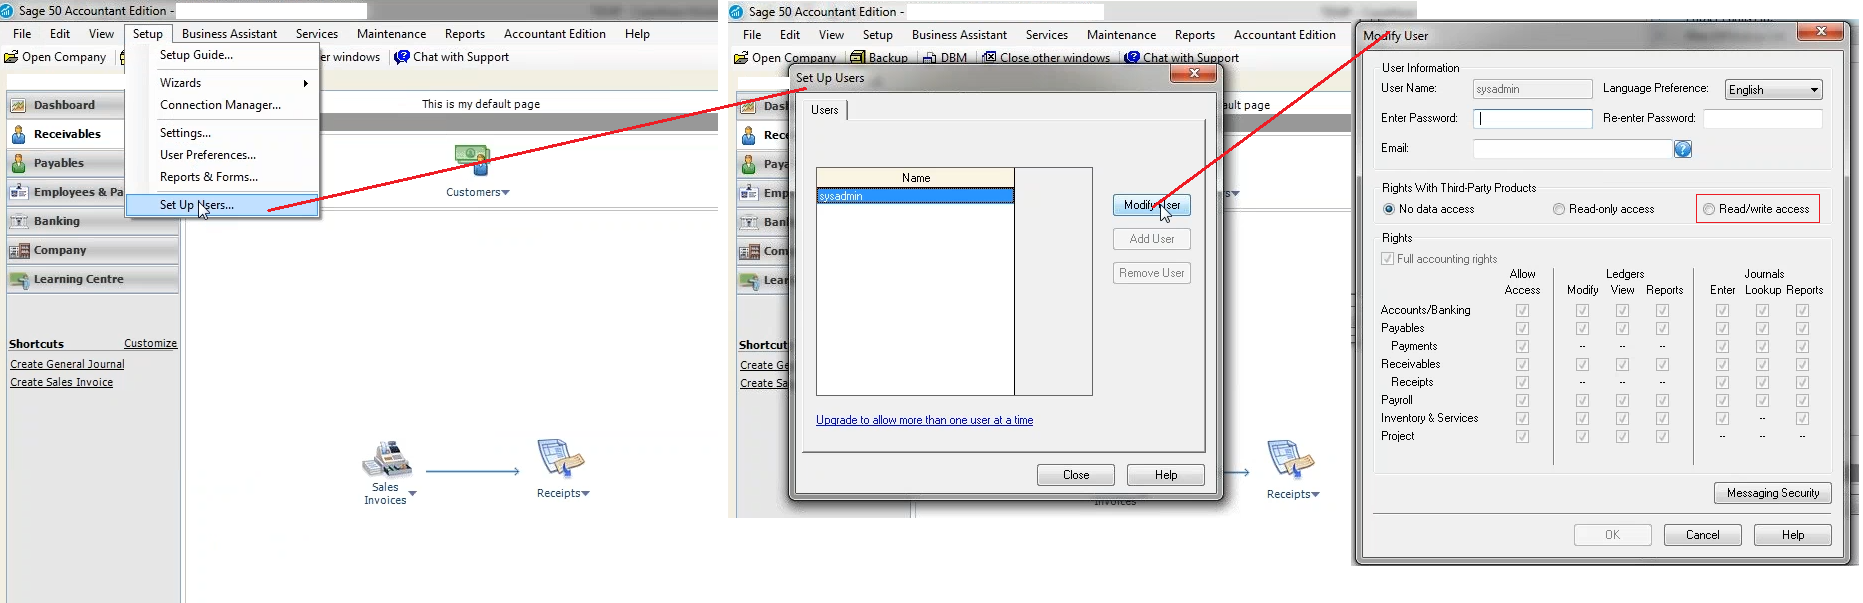
- If you are running Sage 50 Accounting CDN Edition (Simply) 2016 or higher, ensure that the User associated with the Sage 50 file has Read/Write privileges. As seen below, navigate to Setup | Setup Users | Modify Users and ensure that the Read/write access is enabled.
- If Protection is activated, the File permission "Import" is required to perform this operation.
Procedure
-
Open the client file in which you want to import.
-
On the Engagement tab, in the Data group, click Import | Accounting Software.
- In the Import From field, select Sage 50 Accounting CDN Edition (Simply) or Simply Accounting Windows.
-
In the Version field, select version 2008 - 2018.
-
In the Import Path field, type the exact path where the file you want to import resides or use Browse to locate the file manually.
The Simply Accounting data file (.sai) must be on your local hard drive in order to complete the import successfully.
-
Under Import Components, choose to import either:
- The Trial Balance (Opening Entries) or,
- The General Ledger Detail.
-
To import client information, click Import Client Information. This information will be displayed in the Engagement Properties dialog.
- Complete the remaining fields of the dialog. >>Quick Reference
- Click OK to begin importing.
Results
Accounting data is imported into the client file.
Note
- Account Class will not be brought into Working Papers during the import.


