New Automatic Document dialog

Each automatic document has several properties that define its appearance. You can modify these properties to produce several versions of the document. For example, you may want to examine a certain document between a specific set of dates. You can apply this date range by changing the properties of the document.

The top part of the Automatic Document dialog is common to all automatic documents.

Click on a field in the screenshot below to view its description,

or

ClosedClick here to view a list of Automatic Document Settings Properties.
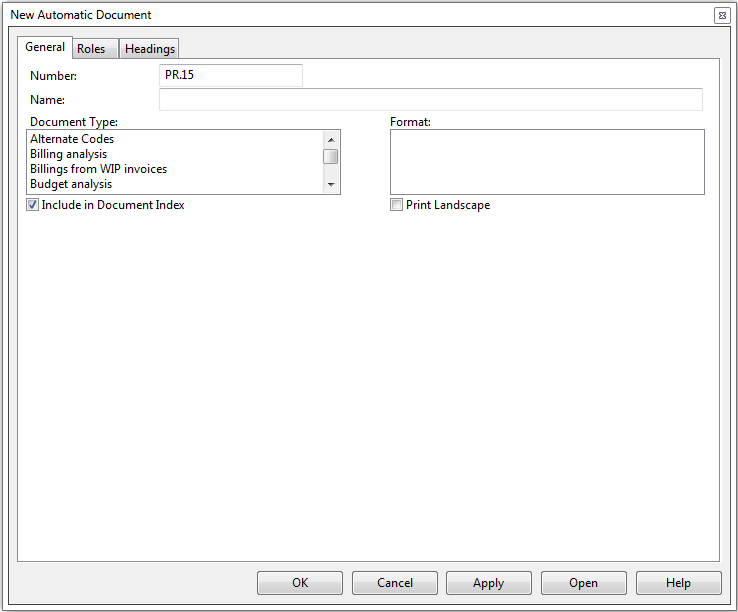
Enter the document number. Each document on the Document Manager must have a unique document number. When printing any document that is more than one page, the page number is automatically displayed at the bottom right hand corner of each page.

Type a brief description of the document. If no description is entered Time inserts the document type as the default name.

The name and number entered here operate independently of the title entered on the Headings tab. Thus, if you are changing the document name or number and want it reflected both on the document and on the Document Manager, ensure you make the change on both tabs.

Each automatic document has several properties that define its appearance. You can modify these properties to produce several versions of the document.

Select a Format for the document. Each Document Type can have a variety of formats. The Formats give the document a different look. For example, there are many different formats for the Billing Analysis documents: Client staff, Client summary, Client work code, Firm summary, and staff.

The Document Index is an automatically generated document listing selected documents on the Document Manager. Each document on the Document Manager has the option of being included in this Document Index. Select this check box to include the current document in the Document Index.

Each automatic document has the option of being printed landscape. Select or clear this check box as needed.

Make selections to control the type and amount of data displayed on the document using the Document Settings. This portion of the properties dialog changes depending on the Document Type and Format selected.

For wide documents (where you have to scroll horizontally across the page) a vertical freeze is available for lead columns. Lead columns remain fixed as you scroll to the right of the page. Headers and footers remain fixed when scrolling horizontally as well. The following reports use the vertical freeze feature:

  • Client - Summary
  • Contacts Companies - Summary
  • Groups - Summary
  • Project list
  • Project - Over Budget
  • Contact - Summary
  • Project Templates
  • Cash Receipts Journal - Aged (for Manager Groupings)
  • Recurring invoice codes
  • WIP - Summary total amounts

Related Topics