XBRL Document Tagging Dialog
Use this command to assign XBRL tags to a document. Tags can be assigned to any cells, paragraph or section in a document.
Taxonomy
Select the taxonomy to be tagged in the document. Taxonomies are saved in a folder called "Taxonomies" in the program file. Once selected, the taxonomy appears in the label box in a collapsed tree format.
Note: To add a new taxonomy, download the file and save it to the Taxonomies folder in the Working Papers or Time program folder.
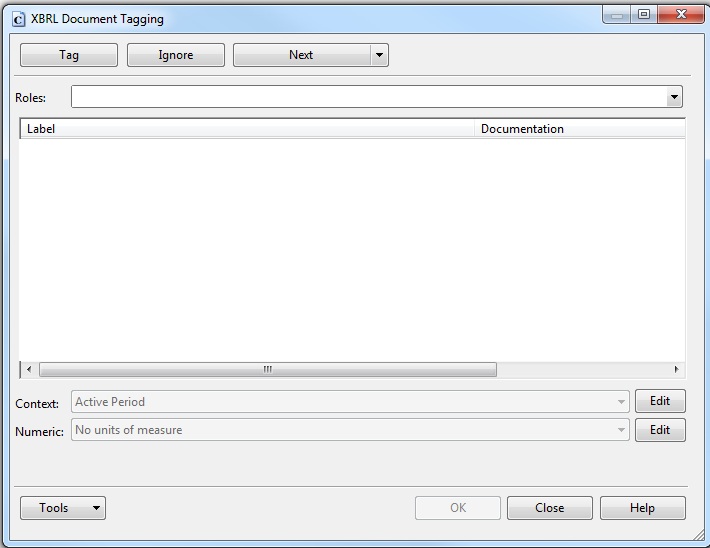
The following table describes each field in the dialog.
|
Field |
Description |
|
Tag / Remove Tag |
In the open CaseView document you can select a cell, paragraph, or section area and click Tag to assign the appropriate XBRL element. Once you’ve clicked Tag, select the label and the context and numeric context. If the selected area already has an XBRL tag, this button switches to Remove Tag which can be clicked to remove the XBRL tag, if needed.
|
|
Ignore / Remove Ignore
|
Select Ignore to mark the selected area so that it is skipped over when you use the navigation options. For example, if you click Next Tagged Data, the area in the document marked to be ignored is skipped over. If the selected area already has an XBRL tag, this button switches to Remove Ignore which can be clicked to remove the Ignore tag, if needed.
|
|
Next
|
To tag the document more efficiently, click the Next drop-down button to move to specific areas in the document. All Data – Previous - Navigates all available areas in the document in reverse order. Note that this includes areas that have been marked as Ignored. All Data – Next - Navigates all available areas in the document in the forward direction. Note that this includes areas that have been marked as Ignored. Tagged Data – Previous - Navigates to the previous area in the document that has already been tagged with an XBRL tag. Tagged Data – Next - Navigates to the next area in the document that has already been tagged with an XBRL tag. Undealt Data – Previous - Navigates to the previous area in the document that does not have an XBRL tag assigned to it. Undealt Data – Next - Navigates to the area in the document that does not have an XBRL tag assigned to it.
|
|
Roles |
Select a presentation role available in the taxonomy you selected. The taxonomy elements in the Label area change to reflect the role selected.
|
|
Label |
The Label area displays a list of the taxonomy elements from the role selected. Select the XBRL element that corresponds with the selected item in the CaseView document. You can expand and collapse items in the list. To open all items on the same level and below, hold down the SHIFT key and click the
|
|
Context |
Select a context for the data being tagged, for example reporting period. If needed, you can make changes to the context by clicking the Edit button.
|
|
Numeric |
Select the type of numeric data being tagged. If needed, you can make changes to the numeric context by clicking the Edit button. Scaled Sets rounding for monetary value tags. Allows amount to be scaled from tens to millions. Flip Sign of numeric value during export Select to change the sign of the information being tagged when the XBRL document is created.
|
|
Tools |
Click the Tools drop-down button to access a find feature and various options that change what is displayed in the Label area. Find To search for items in the Label area, select Find and enter the information you want to find. Once the information is found, you can tag the information immediately and continue searching. Options The following options are available to change the data displayed in the Label area.
|
|
OK |
Click OK to save the last set of tags you applied and to close the dialog. The OK button is available only after you have made tagging changes to the selected data, for example, if you clicked on the Tag or Ignore buttons.
|
|
Cancel |
Click Cancel to cancel tagging of the currently selected data only.
|
| Find |
Use the keyboard shortcut Ctrl+F or Home | Find to open the Find dialog and search through the tag labels. Once you have found the tag label, click Close in the Find dialog. Click Tag to tag the selected information with the searched tag.
|
![]()
Visit us: www.caseware.com | Follow us: 


© 2019 CaseWare International Inc. | Privacy | Terms of Use | Trademarks